AI Image to Video: How to Turn Images Into Videos
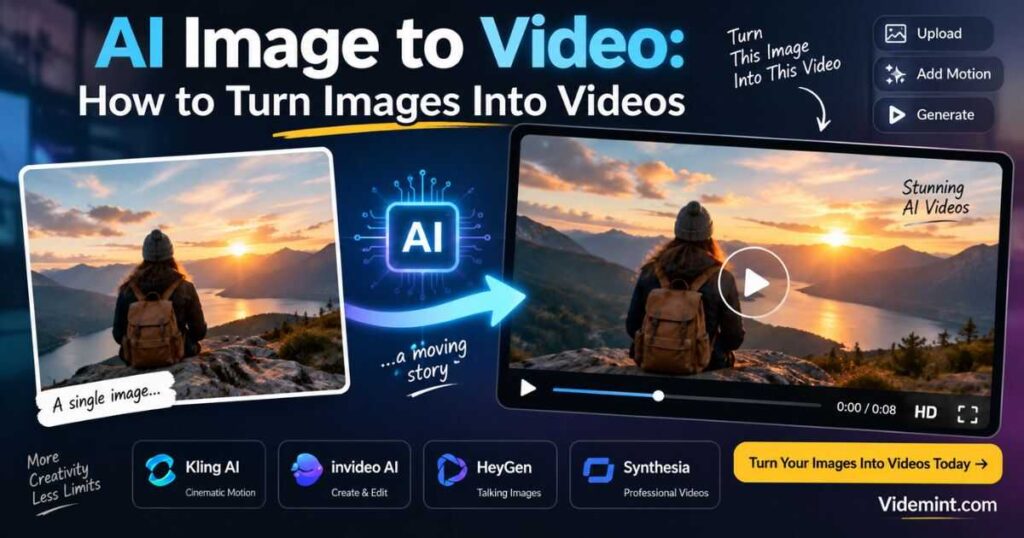
A single image can tell a story, but turning that image into a moving scene can make it far more engaging. With AI image to video technology, you can animate portraits, product photos, illustrations, landscapes, characters, and other still images without manually creating every frame.
Instead of starting with a blank video timeline, you provide an image that already contains the visual style, composition, character, or product you want. The AI then generates movement based on your instructions, such as a camera push-in, flowing hair, walking motion, drifting smoke, or a product rotating on a table.
This makes AI image to video useful for YouTube creators, marketers, social media creators, advertisers, and anyone who wants to turn static visual assets into short video clips.
The process is relatively simple, but the quality of the result depends heavily on the source image, motion prompt, camera direction, and AI model you choose. This guide explains how to turn images into videos with AI, how the technology works, which tools are worth considering, and how to get more realistic results.
What Is AI Image to Video?
AI image to video is a type of generative video technology that takes a still image and creates a moving video clip from it.
Instead of generating every visual decision from a text prompt, the image provides the starting visual information. The AI analyzes the subject, composition, depth, lighting, and other visual elements, then generates additional frames that create the illusion of movement.
For example, you could upload:
- A portrait of a character
- A product photograph
- An AI-generated landscape
- An illustration
- An architectural image
- A fashion photograph
- A thumbnail or concept image
- An old photograph
Then you can describe what should happen.
Example:
A woman slowly turns toward the camera while her hair moves gently in the wind. The camera slowly pushes forward. Natural facial movement and subtle background motion.
The resulting clip can preserve much of the original image while adding motion.
This is different from traditional animation because the creator does not have to manually animate individual objects or keyframes.
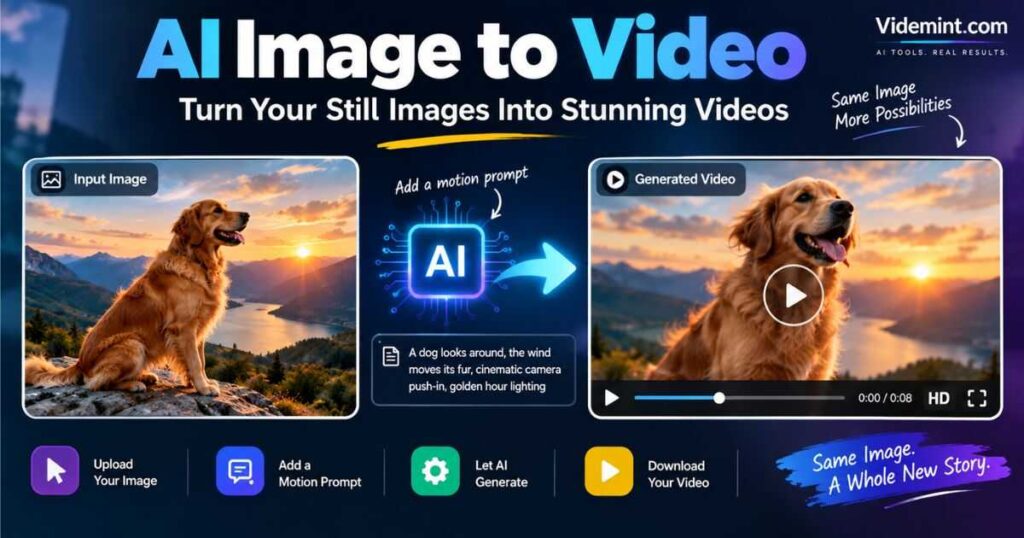
How Does AI Image to Video Work?
An AI image to video generator generally follows a simple process:
| Stage | What happens |
|---|---|
| 1. Upload | You provide the starting image |
| 2. Analysis | The AI analyzes the subject, composition, depth, and visual elements |
| 3. Motion prompt | You describe the desired movement |
| 4. Generation | The model creates new frames around the original image |
| 5. Refinement | You adjust the prompt or settings and regenerate |
| 6. Export | The finished video is exported for editing or publishing |
The image acts as a visual anchor.
That is one of the biggest advantages of AI image to video compared with starting entirely from text. You have already established what the character, product, environment, colors, and composition should look like.
However, the model still has to predict what happens outside the original frame. This is why unusual movements, complicated physics, or dramatic camera changes can sometimes produce artifacts.
AI Image to Video vs. Text to Video
Both technologies generate video with AI, but they start from different inputs.
| Feature | AI Image to Video | Text to Video |
|---|---|---|
| Starting point | Existing image | Text description |
| Visual control | High | Depends on prompt |
| Character appearance | Defined by image | Generated by model |
| Product consistency | Strong starting reference | More difficult |
| Camera direction | Prompt-controlled | Prompt-controlled |
| Best for | Animating existing visuals | Creating scenes from scratch |
| Workflow | Image → Motion | Prompt → Video |
If you already have a character, product, environment, or composition that you like, AI image to video is often the more controlled starting point.
If you do not have an image and want the AI to invent the entire scene, text-to-video may make more sense.
For a broader explanation of the complete AI video workflow, see How to Make AI Videos.
How to Turn Images Into Videos With AI
The basic workflow is straightforward, but each step affects the final result.
Step 1: Choose the Right Image
Start with a clean, high-quality image.
The model can only work with the visual information it receives, so a blurry, distorted, or poorly composed image can make the animation harder.
Good source images usually have:
- A clearly visible subject
- Reasonable lighting
- Defined edges
- A stable composition
- Enough resolution
- Clear separation between foreground and background
For characters, make sure the face and clothing are clearly visible.
For products, avoid excessive reflections or objects covering important details.
For landscapes, choose images with recognizable depth between the foreground, middle ground, and background.
Step 2: Decide What Should Move
One of the biggest mistakes beginners make with AI image to video is asking for too much movement.
You do not need to animate everything.
Instead, decide what naturally moves in the scene.
For example:
Portrait
The woman blinks naturally and slightly turns her head while her hair moves gently in the breeze.
Product
The camera slowly moves from left to right while the product remains perfectly still.
Landscape
Clouds drift slowly across the sky while grass moves gently in the wind.
Character
The character walks slowly toward the camera while the camera tracks backward.
The more specific the movement, the easier it is for the model to understand what should change.
How to Write Better AI Image to Video Prompts
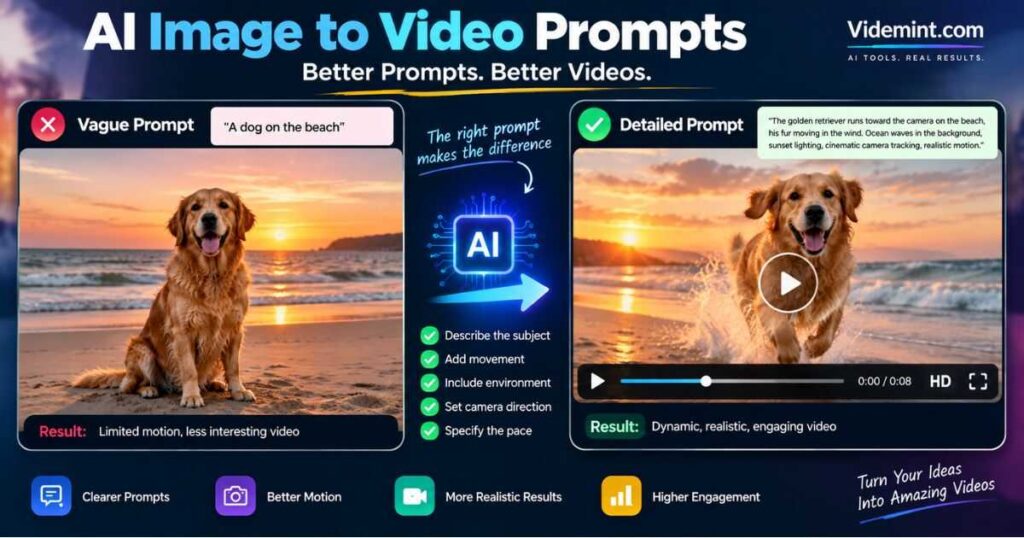
The prompt should describe motion, not recreate the entire image.
A common mistake is writing:
Beautiful cinematic woman standing on a beach at sunset, detailed face, realistic hair, beautiful ocean…
If the image already contains those elements, repeating them adds little value.
Instead, focus on what needs to happen:
The woman slowly turns toward the camera as her hair moves gently in the wind. Small waves move naturally behind her. The camera makes a slow cinematic push-in.
A useful structure is:
Subject + Action + Environment Motion + Camera Movement + Speed
For example:
A golden retriever runs slowly toward the camera, its fur moving naturally in the wind. Water splashes around its paws. The camera tracks backward smoothly at the dog’s pace.
This approach gives the AI image to video generator a much clearer instruction.
For more detailed prompting techniques, read How to Write AI Video Prompts.
How to Make AI Image to Video Results More Realistic
Generating movement is easy. Generating believable movement is harder.
Realistic animation usually comes from restraint.
Use Natural Movement
Avoid asking for extreme movement unless the image supports it.
For example, instead of:
The character rapidly spins around while jumping into the air.
Try:
The character slowly turns and takes two natural steps forward.
Simple actions are often easier for current video models to reproduce consistently.
Keep Camera Movement Simple
Good camera movements include:
- Slow push-in
- Slow pull-out
- Gentle pan
- Controlled tracking shot
- Subtle tilt
- Small orbit
A complicated combination of zooming, rotating, tracking, and rapid subject movement can increase artifacts.
Respect Physics
The movement should make sense for the image.
If a person’s hair is being blown by wind, describe the direction and intensity.
If water is present, avoid asking it to behave like smoke.
If a product is sitting on a table, don’t simultaneously ask it to float, rotate, and change shape unless that transformation is intentional.
For additional realism techniques, see How to Make Realistic AI Videos.
How to Use an AI Image to Video Generator for Characters
Character animation is one of the most useful applications of this technology.
You can generate a character image first, then use it as the starting frame for multiple clips.
However, character consistency can still become a problem.
The face may change slightly. Clothing may shift. Hair can morph. Accessories can disappear.
To reduce these problems:
- Start with a strong reference image.
- Keep the character description consistent.
- Avoid unnecessary camera changes.
- Use reference features when available.
- Keep movements relatively controlled.
- Generate short clips and select the best results.
Kling, for example, provides image-to-video generation alongside character-consistency and reference features. Its current image-to-video workflow supports uploaded images, motion instructions, and start/end frame controls, while its current product page states that free generation is available at 1080p and Pro access can unlock 4K.
For a deeper workflow, read How to Create Consistent Characters With AI.
AI Image to Video With Kling AI
Kling AI Image to Video is particularly useful when you want more control over how an existing image moves.
The current Kling workflow lets you upload an image, describe the motion, and generate a video. Kling also supports start and end frames for more controlled transitions, while its current Video 3.0 system includes native audio and character-consistency features.
A simple Kling prompt
The woman slowly looks toward the camera while her hair moves naturally in a light breeze. The camera slowly pushes in. Subtle background movement, realistic motion, cinematic lighting.
Ready to animate your images?
Try Kling AI and turn your still images into moving scenes with controlled motion and image-to-video generation.
AI Image to Video With InVideo
InVideo AI Image to Video takes a broader approach.
Instead of focusing only on a single generation model, InVideo provides access to multiple image, video, audio, and editing models within one workflow. Its current image-to-video tool allows users to upload JPG, PNG, or WEBP images, describe motion, choose a model, and then edit and publish the result.
This makes it particularly useful when the goal is not simply to animate one image but to turn multiple visual assets into a finished piece of content.
For example, a creator could:
Generate image → Animate image → Add voiceover → Add music → Edit → Export
InVideo also states that its free plan provides limited image-to-video creation, while paid plans remove the weekly caps.
Want an all-in-one workflow?
Try InVideo AI to animate images and continue editing the resulting clips in the same environment.
AI Image to Video With HeyGen
HeyGen Image to Video is especially relevant when your image needs to become a presenter-style or talking video.
HeyGen’s image-to-video tool allows you to upload an image, add motion or audio, and generate a video. Its official page also lists support for common image formats and positions the feature for professional video creation.
This makes HeyGen particularly interesting for:
- Talking characters
- Presenter content
- Marketing visuals
- Social media clips
- Educational content
- Product explainers
Have a portrait or character that needs to speak?
Try HeyGen Image to Video and turn your static visual into a more complete presentation.
AI Image to Video With Synthesia
Synthesia is primarily known for AI presenter and avatar-based video creation, but its current editor also supports converting uploaded images into video using Veo 3.1. Synthesia’s documentation says the feature uses the image as a reference frame and that image-to-video generation consumes credits.
This makes Synthesia more useful when image animation is part of a larger business or presentation workflow rather than the only objective.
You can combine visual assets with:
- AI presenters
- Narration
- Slides
- Images
- Video clips
- Business presentations
Need image animation inside a professional presentation workflow?
Try Synthesia and combine AI-generated video with presenters, media, and business-focused content.
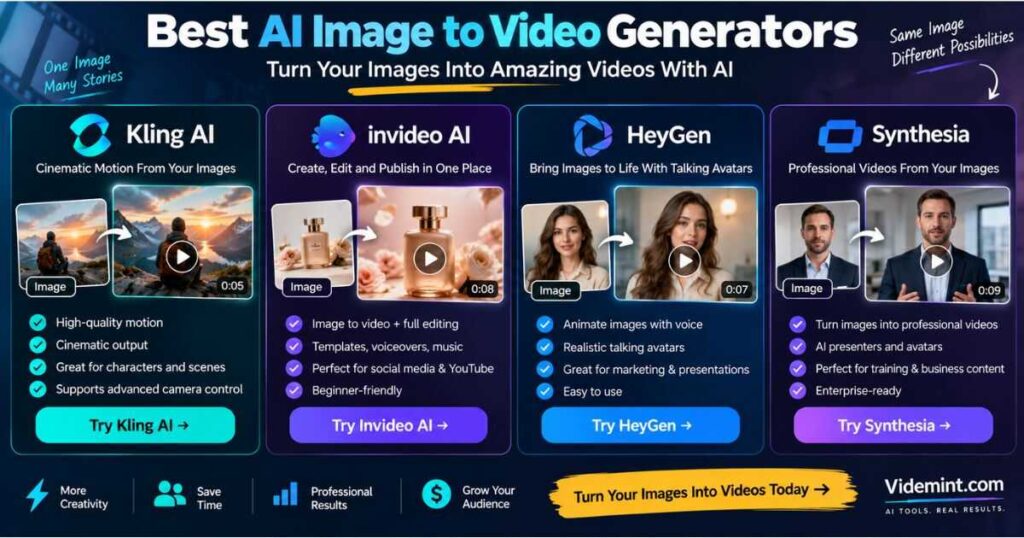
Best AI Image to Video Generators: Which One Should You Use?
There is no single tool that is ideal for every type of project. The right choice depends on what you want to create.
| Tool | Best suited for | Image-to-video strength | Best for |
|---|---|---|---|
| Kling AI | Cinematic image animation | Motion and character consistency | Creators, cinematic clips |
| InVideo AI | Complete video workflows | Image animation + editing | YouTube, ads, social content |
| HeyGen | Talking images and presenters | Image + voice + presentation | Business and social videos |
| Synthesia | Professional presentations | Image assets + AI video workflow | Training and business content |
For creators who primarily want to animate a character or cinematic image, Kling is a natural option. For creators who want to build an entire video around images, voiceovers, music, and editing, InVideo can provide a broader workflow. HeyGen and Synthesia are particularly useful when presenters, avatars, or professional communication are central to the project.
How to Create Multiple Clips From Images
One image rarely makes an entire YouTube video.
Instead, you can create a sequence.
For example:
| Scene | Source Image | Motion |
|---|---|---|
| 1 | Character standing outside | Slow camera push-in |
| 2 | Character walking | Tracking movement |
| 3 | Close-up | Character looks toward camera |
| 4 | Wide environment | Camera pans across scene |
| 5 | Product shot | Slow product rotation |
This workflow is particularly useful for faceless YouTube videos and short-form content.
Instead of asking an AI model to generate a complicated 60-second scene in one attempt, you can create several short clips and assemble them during editing.
This gives you more control over pacing, continuity, and quality.
How to Turn Multiple Images Into a Video
If you have several images rather than one, you can use them as a sequence.
For example:
Image 1 → Motion clip → Image 2 → Motion clip → Image 3 → Motion clip
Then combine the clips in a video editor.
This works especially well for:
- Storytelling
- Product showcases
- Travel videos
- Photo slideshows
- Historical content
- Before-and-after videos
- Character stories
- Faceless YouTube videos
The key is to make the transitions feel intentional rather than simply placing animated images next to one another.
Use similar lighting, color, camera language, and pacing whenever possible.
Common AI Image to Video Problems
Even the best models can produce imperfect results.
1. The subject changes
A face may subtly morph or clothing may change.
Solution: use stronger reference images and more controlled motion.
2. The camera moves too much
A simple prompt can sometimes result in an exaggerated camera move.
Solution: specify the camera movement clearly:
Slow, subtle push-in.
rather than:
Dynamic cinematic camera movement.
3. Objects deform
Hands, fingers, wheels, text, and small objects can sometimes change during generation.
Solution: avoid unnecessary movement around complicated objects and use a cleaner source image.
4. Motion looks unnatural
The subject may move too quickly or behave unlike a real object.
Solution: describe realistic speed and physics.
5. The result looks impressive but does not match the image
This can happen when the prompt asks for an action that requires the model to invent too much new information.
Solution: keep the action compatible with the original composition.
Tips for Better AI Image to Video Results
Use this checklist before generating:
Source image
- Is the image sharp?
- Is the subject clearly visible?
- Is the composition clean?
- Is the lighting consistent?
Motion
- What exactly should move?
- How fast should it move?
- Does the movement make physical sense?
Camera
- Should the camera stay still?
- Should it push in?
- Should it pan?
- Should it track the subject?
Consistency
- Is the character clearly defined?
- Are important objects visible?
- Are reference images available?
Output
- Do you need 16:9 for YouTube?
- 9:16 for Shorts, TikTok, or Reels?
- 1:1 for certain social posts?
A few seconds of planning can save many failed generations.
How to Use AI Image to Video for Faceless YouTube
For faceless channels, this workflow can be extremely useful.
Imagine creating a history video.
Instead of relying entirely on stock footage, you could generate:
- A historical character image
- A city or environment image
- A historical object
- An establishing shot
- Several close-up images
Then use AI image to video to animate each visual.
After that, combine the clips with:
- Narration
- Background music
- Sound effects
- Captions
- Transitions
This creates a more visually dynamic video without requiring a camera or traditional filming setup.
It also gives creators greater control over the visual style of the channel.
Is AI Image to Video Free?
Some platforms provide free access or limited free generations, but the meaning of “free” varies considerably.
A free plan may include:
- Limited credits
- Watermarked exports
- Lower resolution
- Shorter videos
- Fewer models
- Weekly or monthly limits
For example, InVideo currently describes free image-to-video creation with limited weekly usage, while paid plans remove the weekly caps.
Kling currently advertises free image-to-video generation at 1080p, with paid membership unlocking additional capabilities such as 4K output.
So before choosing an AI image to video generator free plan, check the actual limits rather than assuming unlimited generation.
FAQ: AI Image to Video
What is AI image to video?
AI image to video is a technology that takes a still image and generates a moving video clip from it. The creator usually provides an image and describes the desired movement.
How do I turn an image into a video with AI?
Upload an image to an AI video generator, describe the movement you want, choose the available settings, generate the clip, review it, and refine the prompt if necessary.
What is the best AI image to video generator?
The right tool depends on the project. Kling is well suited to cinematic image animation and character-focused work, while InVideo is useful for broader video production workflows. HeyGen and Synthesia are more relevant when presenters, avatars, narration, or professional communication are central to the project.
Can I use an AI image to video generator for free?
Yes, several platforms offer some level of free access, but limits vary by tool. Free plans may restrict credits, resolution, duration, models, or exports.
Can I turn multiple images into one video?
Yes. You can animate multiple images separately and then combine the resulting clips in an editor. This is useful for storytelling, product videos, slideshows, and YouTube content.
Can AI image to video create realistic motion?
Yes, but the quality depends on the source image, model, prompt, and movement you request. Simple, physically plausible movements generally produce more reliable results than complicated actions.
What images work best for image-to-video generation?
Clear images with a well-defined subject, good lighting, strong composition, and enough resolution generally provide a better starting point.
Final Thoughts
AI image to video has changed the way creators can work with static visual content. Instead of treating an image as the final asset, you can use it as the starting point for an animated scene.
The most reliable workflow is simple:
Create or choose a strong image → describe realistic movement → control the camera → generate a short clip → review the result → refine → edit the best clips together.
The key is not to ask the AI to do everything at once. Give it a strong visual foundation and a clear description of what should move.
For cinematic character animation and controlled motion, Kling AI is worth exploring. For a broader image-to-video and editing workflow, InVideo AI can be useful. HeyGen is particularly relevant when turning images into presenter-style or talking videos, while Synthesia can integrate image-based video creation into a broader presentation workflow.
Ultimately, the best AI image to video results come from combining a good source image with restrained motion, precise prompts, and a model suited to the specific shot. Once you understand that workflow, a single image can become the foundation for an entire video sequence rather than just another static asset.
Continue Learning
- How to Make AI Videos — Learn the complete AI video creation workflow from idea to finished video.
- How to Write AI Video Prompts — Learn how to write prompts that give video models clearer instructions.
- How to Create Consistent Characters With AI — Keep characters visually consistent across multiple AI-generated scenes.
- How to Make Realistic AI Videos — Improve motion, lighting, camera movement, physics, and overall realism.
- AI Movie Generator: How to Create Cinematic AI Videos — Learn how to create stunning cinematic movies with AI tools, prompts, and a practical step-by-step workflow.
- AI Camera Prompts: 30 Camera Movements for Better AI Videos — Discover practical camera movements and copy-paste prompts to create more cinematic AI videos.
- Video Editing for Beginners: The Complete Guide to Editing Your First Video — Tools, Workflow & Tips — A practical beginner’s guide to choosing tools, editing your first video, and building an efficient workflow.
- AI Storyboard Generator: Turn Ideas Into Stunning Videos — Discover how AI storyboard tools transform ideas and scripts into organized, consistent video scenes.