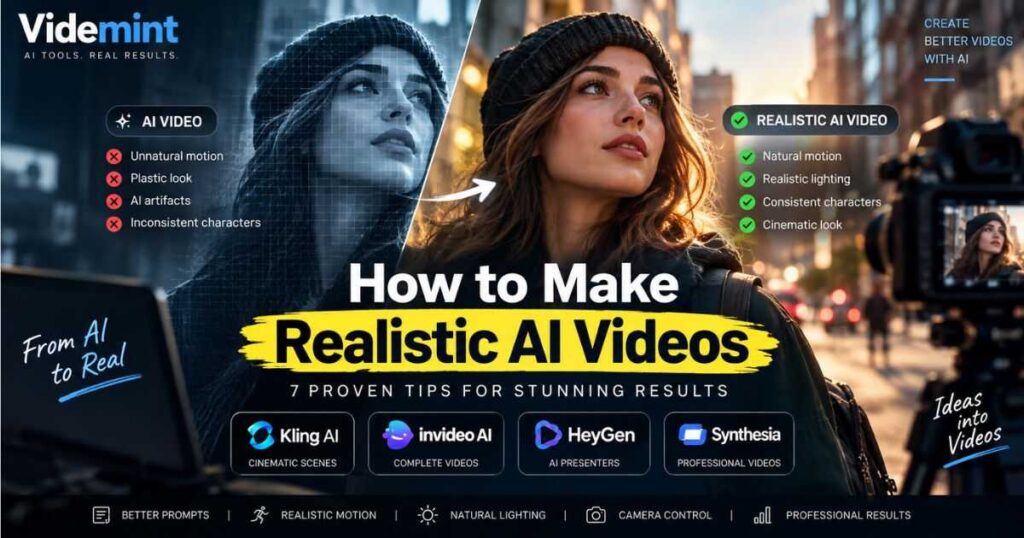
How to Make Realistic AI Videos: 7 Proven Tips
Creating an AI video that looks impressive for three seconds is easy. Creating one that makes viewers forget they are watching AI is much harder.
The difference usually comes down to more than choosing a powerful AI video generator. Realistic results depend on motion, lighting, camera behavior, physics, facial expressions, character consistency, prompting, and the way individual clips are edited together.
This guide explains How to Make Realistic AI Videos without relying on vague instructions such as “make it cinematic” or “make it ultra-realistic.” You’ll learn a practical workflow for generating more believable AI footage, avoiding common artifacts, choosing the right tools, and improving results through controlled iteration.
Whether you are creating cinematic scenes, faceless YouTube videos, Shorts, product videos, or AI-generated storytelling, the same principles can make a noticeable difference.
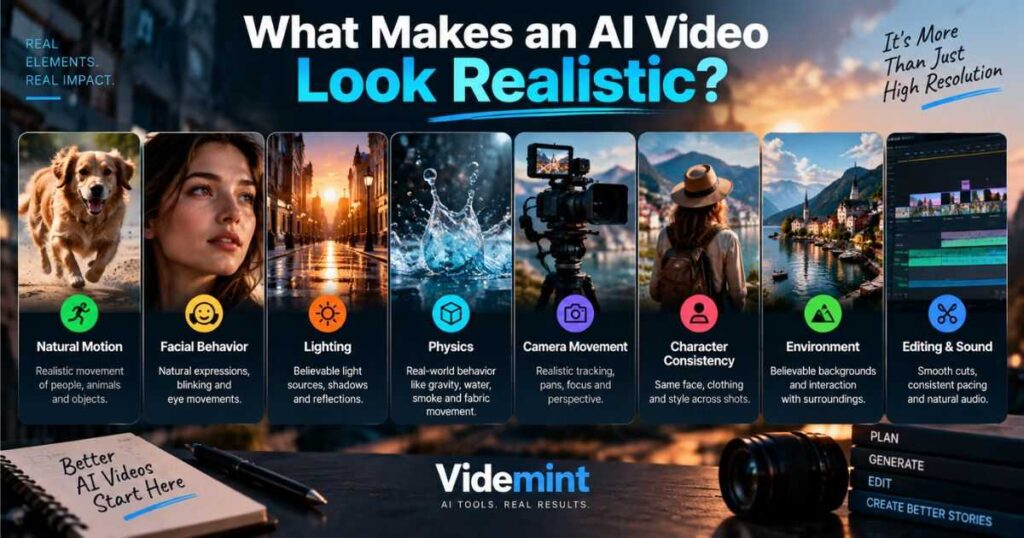
What Makes an AI Video Look Realistic?
Before learning How to Make Realistic AI Videos, it helps to understand what viewers actually notice.
A video can have excellent resolution and still look obviously artificial. Viewers are extremely sensitive to movement and physical behavior. A person’s face might look perfect in a still image, but strange eye movement, unnatural walking, floating objects, or impossible camera movement can immediately reveal the AI generation.
The most important realism factors are:
| Factor | What viewers notice |
|---|---|
| Natural motion | Walking, gestures, hair, clothing, objects |
| Facial behavior | Eyes, blinking, expressions, lip movement |
| Lighting | Shadows, reflections, exposure |
| Physics | Gravity, collisions, water, smoke, fabric |
| Camera movement | Realistic tracking, focus, perspective |
| Character consistency | Face, hair, clothing, proportions |
| Environment | Background movement and interaction |
| Editing | Timing, cuts, sound, continuity |
The goal is not to make every frame technically perfect. The goal is to make the entire scene behave like something that could realistically have been filmed.
That is the foundation of How to Make Realistic AI Videos: making the complete scene feel believable rather than simply making individual frames look impressive.
How to Make Realistic AI Videos: Start With the Right Model
One of the biggest mistakes is assuming that prompting alone can fix a weak generation model.
Different AI video generators have different strengths. Some are better at cinematic scenes and motion, while others focus on avatars, script-to-video automation, or complete production workflows.
For cinematic AI footage, image-to-video and advanced text-to-video models are particularly useful because they give you more control over the visual starting point and movement.
Kling, for example, currently supports text-to-video and image-to-video workflows, reference-based character consistency, motion controls, and native audio features. Its current VIDEO 3.0 workflow also supports multi-shot generation and subject binding for more stable visuals.
That does not mean you should always choose Kling. The right choice depends on the type of video you are producing.
Choose the tool based on the job
| Goal | Best workflow |
|---|---|
| Cinematic AI scenes | Kling, Runway-style generators |
| Image animation | Image-to-video |
| Faceless YouTube | Script-to-video platform or hybrid workflow |
| AI presenter | HeyGen or Synthesia |
| Product videos | Image-to-video + editing |
| Short cinematic clips | Generative video model |
| Educational presenter videos | AI avatar platform |
The important lesson is simple: How to Make Realistic AI Videos starts with choosing a workflow that gives you enough control over the part of the video that matters most.
For a broader look at the production process, see How to Make AI Videos: Complete Step-by-Step Guide.
1. How to Make Realistic AI Videos With Better Prompts
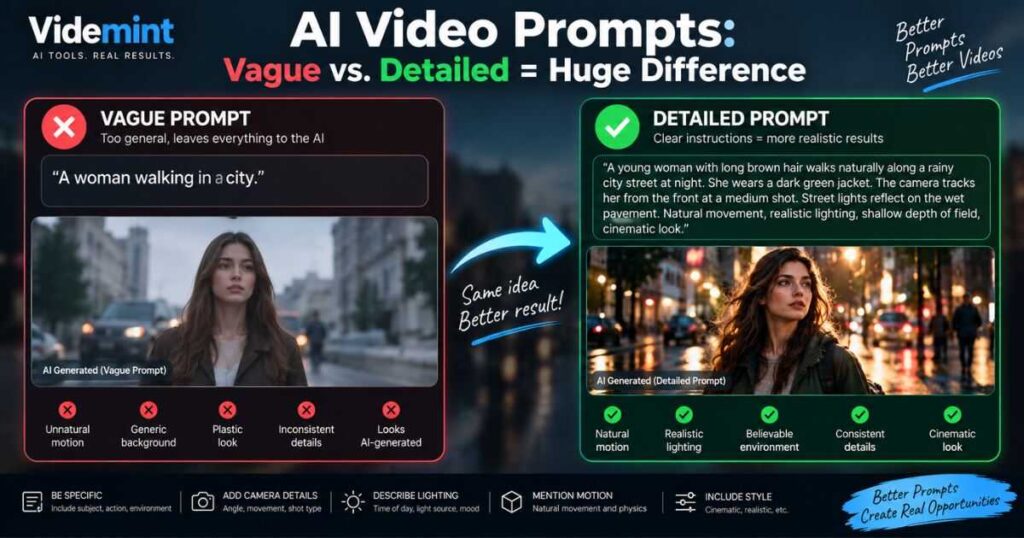
A vague prompt leaves too many decisions to the model.
For example:
A woman walking through a city.
This gives the generator almost no direction about how the scene should actually behave.
A stronger prompt might be:
A young woman in a dark green jacket walks naturally along a rainy downtown street at night. Wet pavement reflects nearby storefront lights. Her jacket moves slightly in the breeze as she walks. Medium tracking shot, natural eye movement, realistic body motion, soft practical lighting, shallow depth of field.
Notice that the second prompt does not simply add more adjectives. It provides observable information.
A useful AI video prompt can include:
Subject + Action + Environment + Camera + Lighting + Motion + Style
Weak vs. strong prompt
| Weak instruction | Better instruction |
|---|---|
| Make it realistic | Natural human movement |
| Cinematic | Medium tracking shot |
| Beautiful lighting | Soft light from nearby storefronts |
| Realistic person | Natural blinking and subtle facial movement |
| Windy | Hair and clothing move gently with the wind |
| High quality | Detailed skin and realistic environmental textures |
The goal is not to create the longest possible prompt.
When learning How to Make Realistic AI Videos, specific visual instructions are usually more useful than filling a prompt with unnecessary quality adjectives.
The goal is to tell the model what should actually happen.
For a deeper prompting workflow, read How to Write AI Video Prompts That Actually Work.
2. Use Image-to-Video for Greater Visual Control
If you want maximum control over the appearance of a scene, image-to-video is often a better starting point than asking the AI to invent everything simultaneously.
The workflow becomes:
Idea → Reference Image → Animation Prompt → Video
First create the still image.
Then tell the video model how that image should move.
For example, create an image of a woman standing on a rainy street. Then use an animation prompt such as:
She slowly walks toward the camera while the camera moves backward smoothly. Her hair and jacket respond naturally to the wind. Rain falls continuously while reflections shimmer on the wet pavement.
This separates visual design from motion design.
Kling’s current image-to-video workflow allows users to upload an image, describe the desired motion, and generate the resulting video. Its documentation also highlights reference-based workflows for maintaining visual characteristics during animation.
This approach is especially useful when you care about:
- Character appearance
- Product appearance
- Composition
- Clothing
- Lighting
- Environment
- Camera framing
For creators learning How to Make Realistic AI Videos, this is one of the easiest ways to reduce random visual changes between generations.
3. How to Make Realistic AI Videos With Natural Motion
This is where many AI-generated videos fail.
A still image can look almost photographic, but the moment the subject starts moving, problems become obvious.
Common issues include:
- Strange walking cycles
- Floating feet
- Excessive head movement
- Hands changing shape
- Clothing passing through the body
- Hair moving unnaturally
- Objects appearing to float
- Sudden changes in body proportions
- Facial expressions that change too quickly
The solution is surprisingly simple:
Ask for less movement when less movement is appropriate.
Instead of:
The woman dramatically spins around while running toward the camera.
Try:
The woman walks naturally toward the camera at a steady pace, maintaining relaxed posture and subtle facial movement.
Real life contains a lot of restrained movement.
Understanding this is essential for How to Make Realistic AI Videos because believable movement is often more subtle than the dramatic motion AI models can easily produce.
People do not constantly swing their arms dramatically. Cameras do not always orbit subjects. Clothing does not violently move unless there is enough wind to cause it.
Think about physics
When learning How to Make Realistic AI Videos, ask yourself:
What should physically happen in this scene?
If someone sits on a chair, their body should respond to the chair.
If wind blows, hair and clothing should react.
If someone walks through water, the water should respond.
If a glass falls, gravity should affect it.
If a person turns their head, the movement should happen progressively rather than instantly.
These small details are often more important than adding “8K” or “photorealistic” to a prompt.
4. Control Camera Movement Like a Real Filmmaker
Another major difference between amateur-looking AI video and convincing footage is camera behavior.
AI models can generate dramatic camera movements very easily, but dramatic does not automatically mean realistic.
Common camera movements include:
| Camera movement | Best use |
|---|---|
| Slow push-in | Emotional or dramatic moments |
| Pull-back | Revealing the environment |
| Tracking shot | Following a moving subject |
| Pan | Showing a wider environment |
| Tilt | Revealing height |
| Orbit | Product or character showcase |
| Handheld | Documentary realism |
| Static shot | Dialogue and controlled scenes |
| Crane movement | Establishing shots |
Instead of writing:
Make the camera cinematic.
Describe the actual movement:
The camera slowly tracks backward as the woman walks toward it, maintaining a medium shot.
That gives the model a specific physical instruction.
Kling’s current tools include Motion Control, while its VIDEO 3.0 documentation describes camera-aware multi-shot generation and subject consistency during camera movements.
A useful rule
One important camera movement per shot is often better than five.
If the subject is walking, the camera does not necessarily need to orbit, zoom, tilt, rotate, and crane simultaneously.
Simple camera behavior often looks more believable.
5. How to Make Realistic AI Videos With Better Lighting
Lighting is one of the fastest ways to make an AI scene feel artificial.
Instead of simply writing:
Cinematic lighting.
Describe where the light comes from.
For example:
Warm light from the restaurant windows illuminates the woman’s face while cool blue street light fills the background.
That creates a relationship between the subject, environment, and light source.
Realistic lighting usually has:
- A believable light source
- Directional shadows
- Consistent exposure
- Natural highlights
- Environmental reflections
- Appropriate contrast
- Light that changes logically with the scene
For example, if your subject is standing beside a bright window, the side of the face closest to the window should generally receive stronger illumination.
If the scene takes place at night, the environment should not look evenly illuminated as if it were shot in a studio.
Avoid overloading the prompt
You do not need:
Ultra-realistic, hyper-realistic, photorealistic, 8K, cinematic, masterpiece, Hollywood, professional, extremely detailed…
Instead, describe what the camera should see.
This makes How to Make Realistic AI Videos less about magic keywords and more about visual direction.
6. Keep Characters and Objects Consistent
A realistic first shot can still fail if the character looks different in the next shot.
You might start with:
- Brown hair
- Green eyes
- Red jacket
- Small necklace
Then the next generation produces:
- Different hair
- Different face
- Blue jacket
- Missing necklace
The individual clip might still look good, but the sequence immediately feels artificial.
This is why character consistency is closely connected to realism.
Use a master reference image and a stable identity description whenever possible. Reference-based workflows can give the model more visual information than text alone.
Kling’s Elements workflow, for example, lets creators use reference images for subjects and keep those elements more consistent across generated video.
For a complete workflow, read How to Create Consistent Characters With AI: AI Video Guide.
Keep these details stable
| Character detail | Keep consistent? |
|---|---|
| Face | Yes |
| Hair | Yes |
| Eye color | Yes |
| Body proportions | Yes |
| Signature clothing | Usually |
| Accessories | When important |
| Visual style | Yes |
| Environment | No — unless continuity requires it |
| Action | No |
| Camera angle | No |
The key is to keep the identity stable while allowing the scene to change.
7. Improve Realism Through Editing and Sound
Even the best AI-generated clip can feel artificial when dropped directly into a final video.
Editing gives you another opportunity to hide weaknesses and strengthen realism.
Start by removing:
- Awkward frames
- Strange hand movements
- Facial glitches
- Unnatural transitions
- Excessive camera movement
- Clips with obvious artifacts
Then focus on sound.
A realistic visual with completely silent surroundings can feel fake.
Consider adding:
- Room ambience
- Footsteps
- Traffic
- Wind
- Rain
- Clothing movement
- Object sounds
- Natural background noise
Sound creates context.
For example, if someone walks through a busy city but the video has no environmental audio, the scene may feel strangely empty.
Use cuts strategically
You do not need to show every generated frame.
If a six-second generation has one excellent moment and three weaker seconds, use the excellent section.
The viewer does not know how many credits were spent generating the clip.
They only see the final edit.
The Best Tools for Making Realistic AI Videos
Different tools solve different realism problems. There is no single platform that is perfect for every workflow.
Kling AI — Best for Cinematic AI Scenes
Kling is particularly relevant when you need cinematic generation, image-to-video workflows, motion control, and character consistency. Its current video tools support reference-based generation, subject binding, and native audio capabilities.
Best for:
- Cinematic scenes
- AI characters
- Image-to-video
- Controlled motion
- Short-form storytelling
- Visual experiments
If realistic motion and visual control are your priority, Kling is one of the first tools worth testing.
For a detailed breakdown, see Videmint’s Kling AI Review.
InVideo AI — Best for Complete Video Workflows
InVideo AI takes a different approach. Instead of focusing exclusively on individual cinematic generations, it combines scripting, visuals, voiceovers, stock media, editing, captions, and other production steps in one workflow.
That makes it particularly useful when your priority is producing complete videos efficiently, rather than controlling every generated frame manually.
Best for:
- Faceless YouTube
- Script-to-video
- Marketing videos
- Educational content
- Social media
- High-volume production
You can also read the detailed InVideo AI Review before choosing a plan.
HeyGen — Best for Realistic AI Presenters
If your definition of realism is a convincing presenter speaking naturally to the camera, HeyGen is a different category from cinematic generators.
Its current AI video generator combines scripts, avatars, voice, B-roll, editing, and captions in a browser-based workflow.
HeyGen is particularly useful for:
- Educational videos
- Tutorials
- Marketing presentations
- Product explainers
- Training
- Presenter-led YouTube content
For a deeper comparison, see Videmint’s HeyGen Review.
Synthesia — Best for Professional Presenter Videos
Synthesia is particularly strong when realistic video means a polished presenter delivering structured business, educational, or training content.
Its current platform supports script-based video creation, AI avatars, generated B-roll, brand tools, and multilingual video production.
Best for:
- Corporate training
- Educational videos
- Business presentations
- Internal communications
- Product explainers
- Multilingual content
The important distinction is that Synthesia and HeyGen are usually more appropriate for presenter realism, while Kling-style generators are better suited to cinematic scene generation.
A Practical Workflow for Realistic AI Video
If you want a repeatable process, use this:
This workflow gives you a practical way to approach How to Make Realistic AI Videos without relying on trial and error for every generation.
Step 1: Plan the scene
Decide what the viewer should see.
Step 2: Create the reference image
Establish the character, product, environment, or composition.
Step 3: Write the motion prompt
Describe what should move and how.
Step 4: Generate a short clip
Do not generate an entire video before testing the visual style.
Step 5: Check realism
Look for:
- Hands
- Eyes
- Face
- Walking
- Physics
- Shadows
- Hair
- Clothing
- Background behavior
Step 6: Refine the prompt
Change one or two variables rather than rewriting everything.
Step 7: Generate additional shots
Keep the successful visual identity and style consistent.
Step 8: Edit
Remove weak generations and keep the strongest moments.
Step 9: Add sound
Use voice, ambience, music, and sound effects appropriate to the scene.
Step 10: Review the finished sequence
Watch it without stopping.
Ask yourself:
Would I believe this was filmed by a real camera if I did not know it was AI?
That is a much better test than simply asking whether the individual frames look beautiful.
Common Mistakes That Make AI Videos Look Fake
Even when you understand How to Make Realistic AI Videos, a few common mistakes can undermine the result.
Using too many quality keywords
“8K,” “cinematic,” and “ultra-realistic” cannot compensate for poor scene direction.
Making every shot move
A static shot can be more believable than an unnecessary camera orbit.
Generating long scenes
Shorter clips are usually easier to control and regenerate.
Changing the character description
Small changes can produce large identity differences.
Ignoring physics
If objects behave incorrectly, viewers notice quickly.
Overcomplicating the prompt
More words do not automatically mean more control.
Keeping every generation
You are allowed to throw away bad clips.
Generation credits are already spent. Keeping a weak clip does not recover them.
How to Make Realistic AI Videos for YouTube
For YouTube, realism is only part of the equation.
You also need:
- A strong topic
- A compelling opening
- Clear narration
- Good pacing
- Consistent visuals
- Useful B-roll
- Appropriate music
- Captions
- Strong editing
- A compelling thumbnail
For faceless channels, a practical workflow can look like:
Research → Script → Prompts → Reference Images → AI Video → Voice → Editing → Sound Design → Thumbnail → YouTube
This is where a hybrid workflow often beats complete automation.
Use specialized generation tools for the shots that need maximum realism, and use an all-in-one platform when speed and production volume matter more.
Frequently Asked Questions
What is the best AI tool for realistic videos?
There is no universal winner. For cinematic scenes and controlled image-to-video generation, Kling is a strong option. For AI presenters, HeyGen and Synthesia are more appropriate. For complete script-to-video workflows, InVideo AI is particularly useful.
How to Make Realistic AI Videos without expensive equipment?
You can create the entire production digitally using AI image generators, video generators, voice tools, and editing software. Start with short test clips and free credits where available before committing to paid plans.
Can AI-generated videos look completely real?
They can become highly convincing, but results vary by model, scene complexity, motion, lighting, and prompting. The more complex the physical interaction, the more carefully the scene usually needs to be generated and edited.
How do I stop AI video characters from changing?
Use a strong reference image, keep the identity description consistent, and use reference-based generation where supported. Avoid rewriting the character from scratch for every scene.
Should I use text-to-video or image-to-video?
Use text-to-video when you want the model to create the scene from scratch. Use image-to-video when you already have a specific visual design that you want to animate.
Why does my AI video look realistic in one frame but fake when it moves?
Motion often exposes problems that are invisible in a still image. Pay particular attention to walking, hands, eyes, facial expressions, clothing, object interactions, and camera movement.
Does adding “photorealistic” make AI video more realistic?
Not by itself. Specific instructions about motion, lighting, camera behavior, physics, and environmental interaction usually provide more useful direction than repeatedly adding quality adjectives.
How long should an AI-generated video clip be?
Short clips are often easier to control, particularly for complex scenes. Generate manageable shots, keep the strongest moments, and assemble them during editing rather than trying to generate a complete long sequence in one pass.
Final Thoughts
Learning How to Make Realistic AI Videos is less about discovering one magical prompt and more about controlling the entire visual process.
Start with a strong visual reference. Give the model specific instructions. Keep character identity stable. Use believable camera movement. Think about physics and lighting. Generate shorter clips, inspect them carefully, and do not hesitate to regenerate weak shots.
Most importantly, stop judging AI video quality from a single beautiful frame.
Watch the movement.
Does the person walk naturally? Does the clothing respond to the environment? Do shadows make sense? Does the camera behave like a real camera? Do objects interact correctly?
Those details are what separate an impressive AI demo from a video that actually feels real.
If you want to continue building a complete AI video workflow, start with How to Make AI Videos, then learn How to Write AI Video Prompts and How to Create Consistent Characters With AI. Together, these workflows cover the most important steps from concept to believable final footage.