Kling AI Tutorial (2026): Create Your First AI Video
If you are looking for a Kling AI Tutorial that actually shows you what to do inside the platform—not just a list of features—this guide will walk you through the process from your first login to generating polished AI videos.
Kling AI has become a popular choice for creators who want realistic AI-generated video, image-to-video animation, cinematic camera movement, and more control over how a scene looks and moves. But the number of tools available can make the platform feel complicated when you first open it.
The good news is that you do not need to learn everything at once.
This Kling AI Tutorial focuses on the workflows that matter most: finding the right generation tool, writing effective prompts, choosing settings, creating your first clip, animating images, and improving results without wasting unnecessary credits.
Whether you want to create YouTube videos, Shorts, social media content, cinematic scenes, product visuals, or faceless content, you can use the same basic workflow as a starting point.
Quick answer: Start with Generate, open All Tools if you need a specific generation method, choose the tool that matches your project, write a focused prompt, select your settings, and generate a short test clip before committing to longer or more expensive generations.
Ready to Try Kling AI?
Use the platform while following this Kling AI Tutorial so you can apply each step to a real project instead of simply reading about it.
Start Creating with Kling AI →What Is Kling AI?
Kling AI is a generative AI platform designed to create and transform visual content using text prompts, images, references, and other creative inputs.
For video creators, its most useful capabilities include Text to Video and Image to Video. Instead of filming every scene yourself, you can describe a scene or provide an image and let the AI generate movement and visual sequences.
The platform also includes additional tools designed for more controlled workflows, including reference-based generation and motion-focused features.
One reason Kling AI can be useful is that these tools are organized inside the same workspace. You can begin with a simple text prompt and later move into more advanced workflows as your projects become more ambitious.
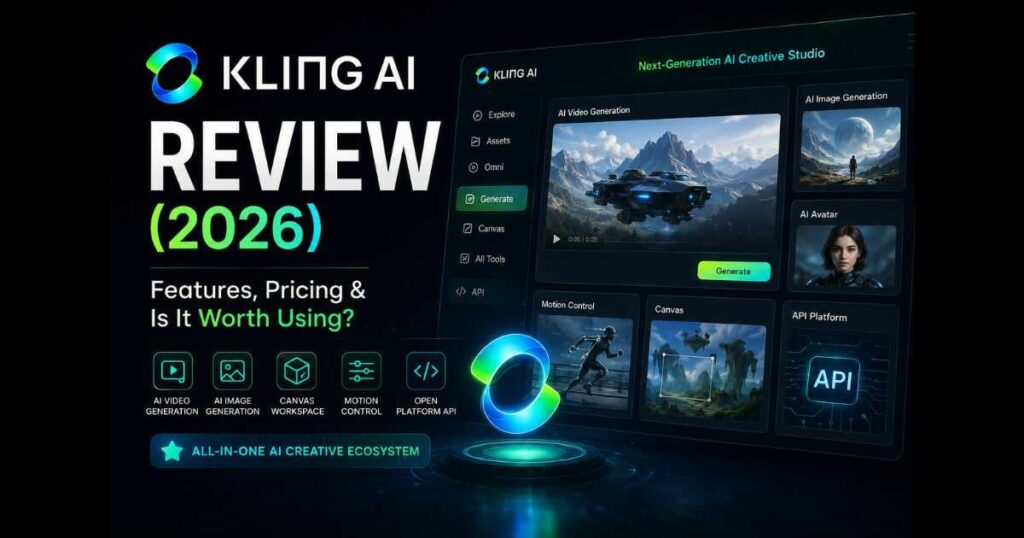
If you are still deciding whether Kling AI is suitable for your needs, read our Kling AI Review (2026) before choosing a subscription.
Kling AI Tutorial: Understanding the Current Interface
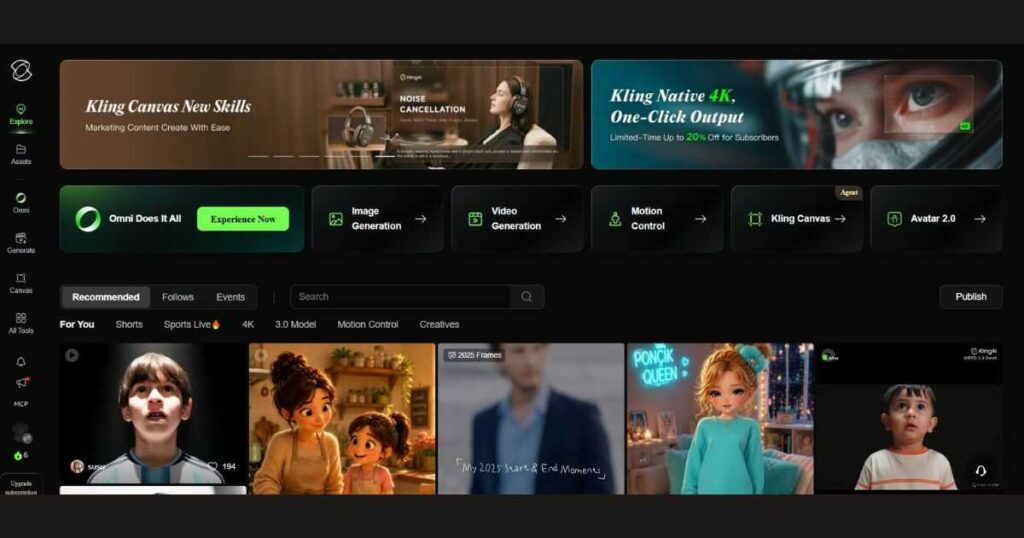
Before generating anything, it is worth understanding the current Kling AI dashboard.
Older guides may refer to a “Create New Video” button. The current interface is organized differently.
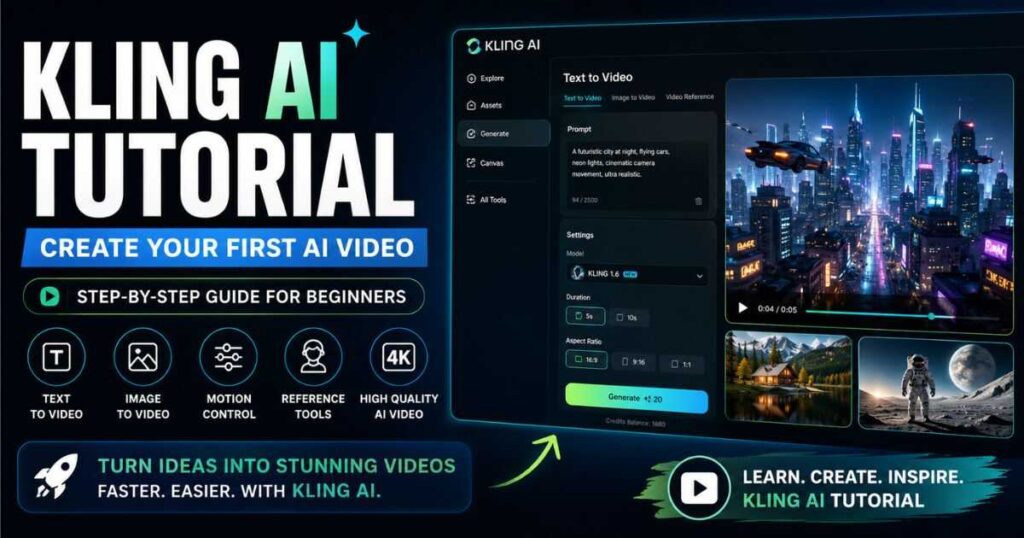
After signing in, the main sidebar includes sections such as:
| Section | What it is for |
| Explore | Discover creations and ideas from the community |
| Assets | Manage generated images, videos, and project files |
| Omni | Access multimodal creative workflows |
| Generate | Main area for creating AI-generated content |
| Canvas | Visual workspace for arranging and working with creative elements |
| All Tools | Browse the available generation tools |
The most important section for a beginner following this Kling AI Tutorial is Generate.
This is where you should start when your goal is to create new AI content.
All Tools becomes particularly useful when you already know which generation method you want to use.
Kling AI Tutorial: How to Choose the Right Tool
One of the easiest ways to waste time in Kling AI is choosing the wrong generation method.
You do not need the same tool for every project.
For example, creating an entirely new cinematic scene is different from animating an illustration you already created.
The following table gives you a simple starting point for this Kling AI Tutorial.
| What you want to do | Start with |
| Create a video from a written description | Text to Video |
| Animate an existing image | Image to Video |
| Maintain a character or object reference | Image/Subject Reference |
| Control movement more precisely | Motion Control |
| Use another video as a visual reference | Video Reference |
Depending on your account and the current platform configuration, you may also encounter tools such as Smart Shot Segmentation, Instruction Transformation, Digital Human, Lip Sync, Creative Effects, and Custom Models.
You do not need to master these features before creating your first video.
Start with one workflow.
Once you understand how Kling AI interprets your instructions, you can gradually move into more advanced tools.
Step 1: Open the Generate Workspace
After signing in, select Generate from the sidebar.
This is your starting point for creating new content.
Rather than immediately opening a traditional video editor, Kling AI gives you access to different generation workflows.
If you already know what you want to create, you can also open All Tools and select the appropriate generation method directly.
For a first project, keep things simple.
If your goal is to create a completely new scene from a written description, choose Text to Video.
If you already have an image that you want to animate, choose Image to Video instead.
This is the first practical step in the Kling AI Tutorial workflow.
Step 2: Choose Text to Video or Image to Video
Text to Video
Text to Video is the simplest starting point when you have an idea but no visual asset.
You describe the scene, and Kling AI uses your instructions to generate a video.
For example:
A golden retriever running along a quiet tropical beach at sunset, cinematic tracking shot, realistic waves, warm golden light, natural movement, detailed fur.
Notice that the prompt does more than identify the subject.
It also tells Kling AI about:
- The environment
- The lighting
- The camera movement
- The visual style
- The desired atmosphere
- The type of motion
That gives the model more information to work with.
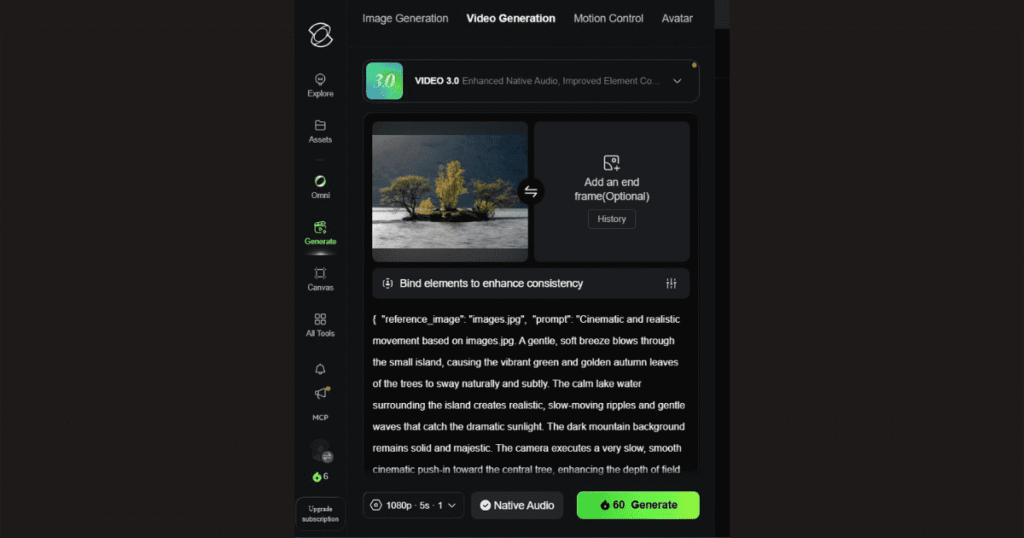
Image to Video
Image to Video works differently.
Instead of asking Kling AI to create the visual foundation from scratch, you provide an image and tell the system how you want that image to move.
For example:
Slow cinematic camera push-in as gentle wind moves the trees and sunlight reflects across the lake.
The key principle is simple:
Describe the movement rather than repeatedly describing what is already visible in the image.
This distinction can make your prompts much more effective.
If you want to explore this workflow in greater depth, see our Kling AI Image to Video guide.
Step 3: Select an AI Model
After choosing your generation workflow, review the available model options.
The exact models and options available can depend on your account and the current Kling AI interface.
If you are a beginner, there is no reason to spend hours comparing every model before generating anything.
Start with the model recommended by the platform or the latest suitable model available to your account.
Then compare models based on actual results.
For example, you might test the same prompt with two available models and compare:
- Prompt understanding
- Motion quality
- Character consistency
- Detail
- Rendering speed
- Credit consumption
This approach is more useful than choosing a model simply because its name sounds more advanced.
A practical Kling AI Tutorial should teach you how to evaluate results, not simply tell you which model name to select.
Step 4: Write Your Kling AI Prompt
Your prompt is one of the most important parts of the generation process.
A weak prompt might look like this:
A futuristic city.
It gives Kling AI very little information.
A stronger version could be:
A futuristic cyberpunk city at night, towering glass skyscrapers covered in neon advertisements, rain-soaked streets reflecting blue and pink lights, pedestrians walking through light fog, cinematic aerial tracking shot, realistic lighting, atmospheric depth, highly detailed environment.
The second prompt gives the model a much clearer creative direction.
A Simple Prompt Formula
A useful structure is:
Subject + Environment + Action + Camera + Lighting + Style + Mood
For example:
A young astronaut walking across a deserted alien planet, enormous mountains in the background, dust moving across the ground, slow cinematic tracking shot, dramatic sunset lighting, realistic science-fiction style, mysterious atmosphere.
You do not need to use exactly this structure every time.
Think of it as a checklist.
Before generating, ask yourself:
What is the subject?
Where is it?
What is happening?
How should the camera move?
What should the lighting look like?
What visual style do I want?
What should the scene feel like?
These fundamentals are at the heart of effective Kling AI prompting, which is why prompt writing receives so much attention in this Kling AI Tutorial.
Need Better Kling AI Prompts?
If you want ready-to-use examples instead of starting every prompt from scratch, check out our Best Kling AI Prompts (2026).
That guide focuses specifically on cinematic prompts, camera movement, realistic scenes, and different creative use cases.
Create Your First Kling AI Video
The easiest way to understand prompt quality is to test the same idea with different instructions and compare the results.
Try Kling AI Free →Step 5: Configure Your Video Settings
Before generating the video, review the available settings.
The options you see may vary depending on the selected generation tool and account.
Resolution
Common video resolutions include:
- 720p
- 1080p
Higher resolution can provide a sharper final result, but it may also require more processing and potentially more credits depending on the generation settings.
If you are still testing a prompt, there is little reason to immediately use your most expensive settings.
Test first.
Create the final version after you are happy with the direction.
Aspect Ratio
Choose the aspect ratio based on where you plan to publish the video.
| Platform | Recommended format |
| YouTube | 16:9 |
| YouTube Shorts | 9:16 |
| TikTok | 9:16 |
| Instagram Reels | 9:16 |
| Square social content | 1:1 |
Choosing the correct format before generation can save you from unnecessary cropping or reworking later.
Duration
Longer generations generally require more resources than short test clips.
If you are experimenting with a new prompt, start with a shorter clip.
Once the concept works, you can invest more resources into the final version.
This approach is particularly useful when you are learning Kling AI because failed experiments become much cheaper.
Step 6: Use Reference Images When Consistency Matters
Reference images can be useful when you want Kling AI to work from an existing visual concept.
For example, imagine that you are creating a story involving the same character across several scenes.
Generating every scene independently may produce noticeable differences in appearance.
A reference-based workflow can help guide the model toward a consistent visual identity.
This can be useful for:
- Storytelling
- Character-based content
- Product videos
- Branded content
- Faceless YouTube videos
- Multi-scene projects
The important point is that reference images are not a replacement for good prompting.
They work best when combined with clear instructions about what should remain consistent and what should change.
Kling AI Tutorial: How to Generate Your First Video
Once your tool, model, prompt, and settings are ready, it is time to generate the video.
Click Generate and wait for Kling AI to process the request.
Rendering time can vary depending on factors such as:
- Selected model
- Video duration
- Resolution
- Current server demand
- Account or subscription level
- Generation type
When processing finishes, review the result carefully.
Do not immediately assume that a poor result means the platform cannot create what you want.
First identify what went wrong.
Was the subject incorrect?
Was the movement too fast?
Did the camera move differently from what you expected?
Was the environment inconsistent?
Did the model misunderstand part of your prompt?
Your answer determines what you should change in the next generation.
Start Testing Your First Generation
If you have been reading this Kling AI Tutorial without testing the workflow yet, this is a good point to create a short sample and compare the result with your original prompt.
Generate Your First Kling AI Video →How to Improve a Bad Kling AI Generation
One of the biggest beginner mistakes is completely rewriting the prompt after every failed generation.
That makes it difficult to understand what actually improved the result.
Instead, change one or two elements at a time.
For example, suppose you wrote:
A cinematic car driving through a futuristic city at night.
The result has poor camera movement.
Instead of replacing the entire prompt, modify the camera instruction:
A cinematic car driving through a futuristic city at night, smooth low-angle tracking shot following the vehicle from behind.
Now you have a clearer idea of whether the camera instruction helped.
Change One Variable at a Time
Try adjusting:
- Camera movement
- Subject action
- Lighting
- Environment details
- Style
- Motion intensity
This method makes experimentation more systematic.
It also helps you develop your own understanding of what Kling AI responds to effectively.
Kling AI Tutorial: How to Use Image to Video Properly
Image to Video deserves special attention because it can produce very different results depending on the source image and motion instructions.
Choose the Right Image
For better results, start with an image that has:
- High resolution
- A clearly defined subject
- Good lighting
- Strong composition
- Minimal compression
- A relatively understandable scene
An image with a clearly defined subject is generally easier to animate than an extremely chaotic composition containing many overlapping objects.
Describe Movement
Once the image is uploaded, focus your instruction on motion.
For example:
The camera slowly pushes toward the subject while the grass moves naturally in the wind and clouds drift across the sky.
This is more useful than writing:
A beautiful landscape with green grass, blue sky, mountains and clouds.
The image already contains those elements.
Your job is to tell Kling AI what should happen to them.
Common Kling AI Beginner Mistakes
Learning a new AI video generator becomes much easier when you know what to avoid.
1. Using Extremely Short Prompts
A prompt containing only the subject often leaves too many creative decisions to the model.
Instead, provide enough information to establish the scene, movement, and visual direction.
2. Trying to Create Everything in One Prompt
Do not try to describe an entire five-minute film in one generation.
AI video works better when you break larger projects into manageable scenes.
Create one scene, evaluate it, then move to the next.
3. Ignoring Camera Movement
Camera direction can dramatically affect the feeling of a shot.
Words such as:
- Tracking shot
- Push-in
- Pull-back
- Pan
- Tilt
- Drone shot
- Close-up
- Wide shot
can help communicate the type of movement you want.
4. Starting With Long Generations
Longer clips can consume more resources while giving you less room for experimentation.
Short tests are usually a smarter way to refine a new idea.
5. Ignoring the Final Platform
A video designed for YouTube Shorts should not necessarily use the same composition as a traditional 16:9 YouTube video.
Decide where the content will be published before generating it.
How Much Does Kling AI Cost?
If you plan to generate videos regularly, understanding Kling AI’s credit system is important.
Your actual costs depend on the plan, generation model, quality, duration, and features you use.
Rather than choosing a subscription solely because it provides more credits, think about how you will use those credits.
For example:
| Creator type | What to prioritize |
| Beginner | Low-cost experimentation |
| Shorts creator | Frequent short generations |
| YouTube creator | Consistent monthly production |
| Professional creator | Higher limits and advanced workflows |
| Heavy AI video user | Credit efficiency and generation capacity |
For a detailed breakdown of plans and credit usage, read our Kling AI Pricing (2026) guide.
Check Kling AI for Yourself
If you are still unsure whether Kling AI fits your workflow, testing it yourself is more useful than comparing screenshots or feature lists.
Explore Kling AI →Kling AI Tutorial: Which Tool Should You Start With?
You do not need to learn every Kling AI feature immediately.
Start with the tool that matches your goal.
| Your goal | Best starting point |
| Create a new scene from an idea | Text to Video |
| Animate an existing image | Image to Video |
| Maintain a visual reference | Image/Subject Reference |
| Create controlled movement | Motion Control |
| Build from another video reference | Video Reference |
For most beginners, Text to Video is the easiest starting point because it teaches you the fundamental relationship between your prompt and the generated result.
After you understand prompting, move into Image to Video and reference-based workflows.
That progression is much easier than trying to master every tool on your first day.
How Creators Can Use Kling AI
Kling AI is not limited to cinematic experiments.
You can use it for many types of content.
YouTube Shorts
Generate short visual sequences for:
- Storytelling
- Educational content
- Motivation
- Historical recreations
- AI documentaries
- Technology content
Faceless YouTube Channels
Kling AI can be particularly useful when you need original visual footage without filming yourself.
For example, a faceless channel could use AI-generated scenes for:
- Technology videos
- History
- Travel
- Space
- Luxury
- Mystery
- Educational content
It can also complement other AI tools used for scripting, voiceovers, avatars, and editing.
Marketing Content
Businesses can use generated scenes for:
- Product demonstrations
- Promotional videos
- Social advertisements
- SaaS explainers
- Brand storytelling
The important thing is to treat AI-generated footage as part of a production workflow rather than expecting one prompt to produce an entire finished video.
Continue Learning Kling AI
Once you understand the basic workflow covered in this Kling AI Tutorial, the next step is to improve the quality and efficiency of your projects.
Here are useful resources to continue with:
- Kling AI Review (2026): Features, Pricing, Pros & Cons — Understand the platform’s strengths, limitations, and ideal use cases.
- Best Kling AI Prompts (2026): 25 Prompts That Actually Work — Explore practical prompt ideas for cinematic and realistic generations.
- Kling AI Pricing (2026): Plans, Credits & Hidden Costs — Learn how plans and credits affect your production workflow.
- Kling AI Image to Video (2026) — Go deeper into image animation and motion prompting.
- Kling O1 Review (2026) — Explore the Kling O1 workflow and capabilities.
Keep Creating With Kling AI
The more you experiment with prompts, references, and generation settings, the easier it becomes to predict what kind of instructions will produce the result you want.
Try Kling AI Today →Frequently Asked Questions
Is Kling AI free?
Kling AI provides limited free access, allowing users to explore the platform and experiment with AI-generated content. More advanced usage, higher generation limits, and additional capabilities may require a paid plan or additional credits.
Is Kling AI good for beginners?
Yes. The platform can be approachable for beginners when they start with one generation workflow rather than attempting to learn every available feature at once.
This Kling AI Tutorial recommends beginning with Text to Video and then moving into Image to Video and more advanced reference-based tools.
Can Kling AI turn images into videos?
Yes. Kling AI’s Image to Video workflow allows you to provide a still image and describe the movement you want to add.
What makes a good Kling AI prompt?
A strong prompt usually explains the subject, environment, action, camera movement, lighting, style, and atmosphere.
The goal is not simply to make the prompt longer. The goal is to make the creative instructions clearer.
Should I start with Text to Video or Image to Video?
Choose Text to Video if you want Kling AI to create the scene from your description.
Choose Image to Video if you already have an image and mainly want to animate it.
How can I get more consistent results?
Keep your prompts focused, generate one scene at a time, use reference images when appropriate, and make controlled changes between generations.
Do not change everything after every failed attempt.
Does Kling AI work for faceless YouTube channels?
Yes. It can be used to create original visual sequences for faceless content, including technology, history, travel, education, motivation, and other niches.
However, a successful faceless channel still requires strong scripting, narration, editing, thumbnails, titles, and audience-focused content.
Final Thoughts: Kling AI Tutorial
This Kling AI Tutorial gives you the foundation you need to start creating with Kling AI without getting overwhelmed by its growing collection of tools.
The most important lesson is simple: do not try to master everything at once.
Start with Generate, choose the tool that matches your goal, write a specific prompt, configure the appropriate settings, and create a short test.
If the result is not right, identify the specific problem and adjust it.
Better AI video generation is rarely about finding one magical prompt. It is about learning how the model responds to different instructions and gradually improving your creative workflow.
Once you are comfortable with Text to Video, experiment with Image to Video. Then explore reference-based generation and motion-focused tools when your projects require more control.
Ready to Put This Kling AI Tutorial Into Practice?
The fastest way to learn is to create something.
Start Creating with Kling AI →Open Kling AI, choose a simple idea, and generate your first short scene.
You do not need a perfect workflow on day one.
You need your first project.