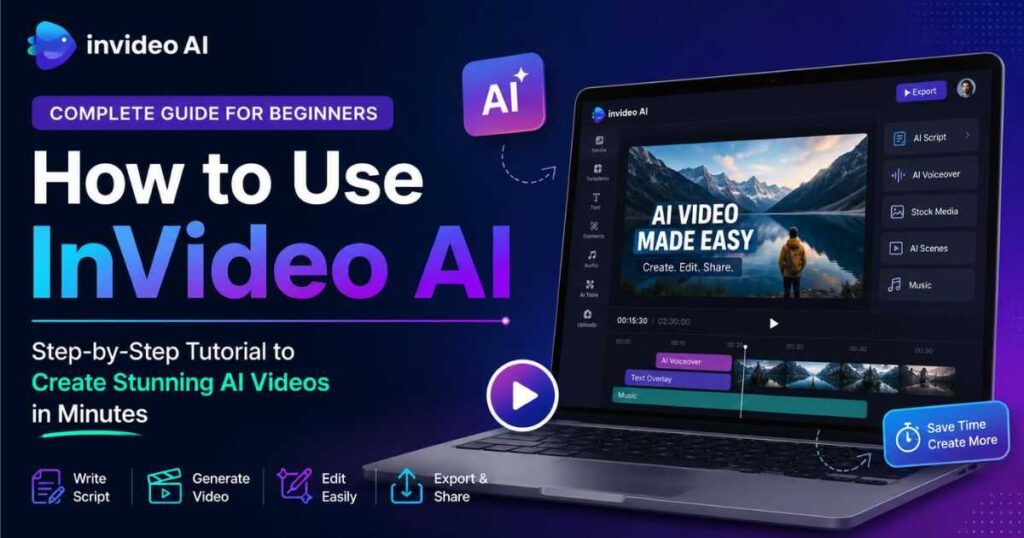
How to Use InVideo AI: Step-by-Step Beginner Guide
If you’re searching for How to Use InVideo AI, you’re probably looking for more than a quick explanation of what the platform does. You want to know where to start, which tools to use, how to create a video from an idea, and how to turn that first draft into something worth publishing.
This complete How to Use InVideo AI guide walks you through the process step by step, from creating a project and choosing the right AI model to generating visuals, adding voice, editing your video, and preparing the final result for YouTube, social media, marketing, or other projects.
InVideo AI has become more than a simple text-to-video generator. Its current workflow brings together AI models, video generation, images, audio, music, editing tools, workflows, agents, and other creative resources inside one workspace. That makes the platform particularly interesting for beginners who do not want to switch between several different AI tools just to produce one video.
The goal of this tutorial is simple: show you how to use InVideo AI without making the process unnecessarily complicated.
Whether you’re creating faceless YouTube videos, Shorts, promotional videos, educational content, product videos, or social media content, the basic workflow is surprisingly straightforward once you understand how the platform is organized.
Ready to Try InVideo AI?
If you want to follow along while reading this guide, you can start with InVideo AI and test the video creation workflow yourself. You can turn an idea into a complete video, experiment with AI-generated visuals, add voiceovers, edit your project, and export the final result from one platform.
👉 Start Creating with InVideo AI
No need to master complicated video-editing software first. Start with a simple project and use this guide to work through the process step by step.
How to Use InVideo AI: What You Need to Get Started
Before learning How to Use InVideo AI, you don’t need professional video-editing experience.
You mainly need three things:
- An InVideo AI account
- An idea for the video you want to create
- A clear understanding of your target audience
The third point is more important than it sounds.
InVideo AI can generate much of the production for you, but the quality of the result still depends heavily on the instructions you provide. A vague prompt can produce a generic video, while a well-structured request can give the AI much better direction.
For example, instead of writing:
“Make a video about AI.”
You could give it a much more useful instruction:
“Create a 60-second YouTube video explaining how AI video generators help beginners create faceless content. Use a fast-paced educational style, clear narration, modern visuals, short sections, and a strong hook during the first five seconds.”
The second instruction gives InVideo AI much more information about the purpose, audience, length, tone, and structure of the video.
That is one of the most important lessons when learning How to Use InVideo AI: the better you communicate your goal, the more useful the first generation is likely to be.
How to Use InVideo AI: Creating Your First Project
Once you have an account, the first step is to create a project.
The exact interface can change as InVideo continues to add new features and AI models, but the overall concept remains the same. You work from a central workspace where you can describe what you want to create and then use the available tools and models to build the project.
Step 1: Start a New Project
Look for the option to create a new project from your workspace.
Give your project a simple name that makes it easy to identify later.
For example:
- AI Video Tutorial
- YouTube Automation Video
- Product Explainer
- Instagram Reel
- Faceless YouTube Episode
A descriptive project name becomes especially useful once you start creating multiple videos.
Step 2: Decide What You Want to Create
Before typing your prompt, answer a few basic questions:
What is the video about?
Who will watch it?
Where will it be published?
How long should it be?
What style should it have?
Should it use narration?
What type of visuals do you want?
You don’t necessarily need to answer every question manually, but thinking through them will help you create better instructions.
For example, a YouTube tutorial requires a different structure from a 15-second social media advertisement.
Step 3: Describe the Video
This is where the core of How to Use InVideo AI begins.
The main creation area allows you to describe the project you want to produce. Think of this as giving a creative brief to an AI video producer.
A strong prompt might look like this:
Create a 90-second YouTube video titled “5 AI Tools That Save Creators Hours Every Week.” The audience is beginner content creators. Use a professional but energetic tone. Start with a strong hook, introduce five tools one at a time, explain the main benefit of each tool, and finish with a short call to action. Use modern technology-related visuals, natural English narration, subtitles, and smooth transitions.
Notice how the instruction provides structure instead of simply naming a topic.
That’s a much better way to use InVideo AI.
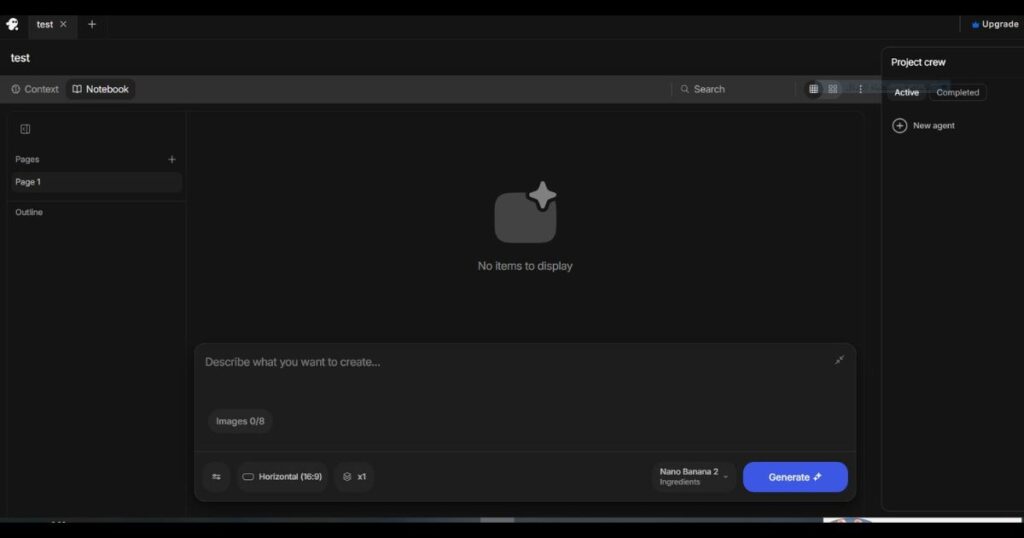
Choosing the Right AI Model
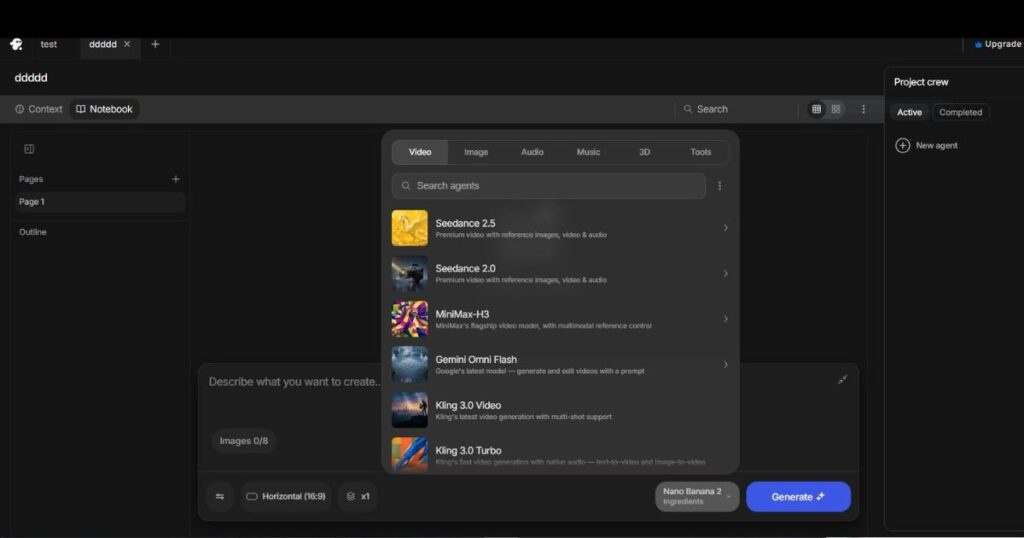
One of the most interesting parts of learning How to Use InVideo AI is understanding that you are not necessarily limited to a single AI generation model.
The platform can provide access to multiple generative models and creative tools from within the same workspace.
Depending on what you’re creating, you may see models such as Kling, Seedance, Nano Banana, and other available models.
However, beginners should avoid making the process unnecessarily complicated.
You do not need to understand every model before creating your first video.
Instead, think about what you need from the model.
For cinematic AI video
A model designed for advanced video generation may be more appropriate when your project depends heavily on original AI-generated scenes.
For images
Image-generation models can be useful when you need custom illustrations, characters, backgrounds, product visuals, or other still images.
For existing media
You may not need generative AI for every scene. Stock footage, uploaded media, images, and other assets can sometimes produce a more practical result.
This is one of the biggest advantages of learning How to Use InVideo AI as a complete workflow rather than treating it as just another text-to-video generator.
You can combine different types of media instead of forcing every scene to be generated from scratch.
How to Use InVideo AI Models More Effectively
A common beginner mistake is choosing a model simply because it sounds powerful.
That isn’t always the best approach.
The better question is:
What does this particular scene need?
Imagine you’re creating a video about a luxury car.
You might need:
- An AI-generated cinematic driving shot
- A stock image of the vehicle
- A close-up product image
- Background music
- A professional voiceover
- Text overlays
There is no reason every part of that video has to come from the same generation model.
Using the appropriate tool for each part can make the final video more efficient and potentially reduce unnecessary generation costs.
This is an important part of How to Use InVideo AI because the platform’s real value isn’t simply the number of AI models available. The bigger advantage is being able to bring different parts of the production workflow together.
Creating the Script With InVideo AI
Once you’ve established the topic and direction, the next important component is the script.
A strong script gives the video a clear structure.
For a typical YouTube video, you might use:
Hook → Introduction → Main Points → Examples → Conclusion → CTA
For a short-form video, the structure can be much tighter:
Hook → Value → Payoff → CTA
If you’re using InVideo AI for faceless YouTube content, this step becomes especially important.
The AI can help produce a script, but you should still review it before generating the final video.
Look for:
- Repeated ideas
- Generic introductions
- Unnecessary sentences
- Incorrect facts
- Weak transitions
- Long sections without visual changes
- Claims that need verification
Don’t assume that a generated script is automatically ready for publication.
AI can speed up the first draft. You are still responsible for the final content.
How to Use InVideo AI for Faceless YouTube Videos
If your goal is to build a faceless YouTube channel, InVideo AI can be particularly useful because you don’t necessarily need to record yourself on camera.
You can build a video around:
- AI narration
- Stock footage
- AI-generated images
- AI-generated video clips
- Text overlays
- Background music
- Screenshots
- Product demonstrations
- Animated elements
For example, suppose your channel covers AI tools.
You could create a video titled:
“7 AI Video Tools That Can Save You Hours”
Your workflow could look like this:
Research → Script → AI narration → Visual selection → Editing → Captions → Export
Instead of manually searching for every individual asset and assembling everything from scratch, InVideo AI can help automate significant portions of the process.
However, automation should not mean publishing the first output without reviewing it.
For a faceless YouTube channel, your competitive advantage should come from better topics, better research, better storytelling, and better editing—not simply from generating videos faster.
How to Use InVideo AI for YouTube Shorts
Short-form content requires a different approach.
YouTube Shorts, Instagram Reels, and TikTok videos usually need a much faster opening than traditional long-form videos.
For example, instead of beginning with:
“In today’s video, we’re going to discuss…”
Start with the value:
“This AI tool can turn a simple idea into a complete video in minutes.”
Then immediately demonstrate the result.
When learning How to Use InVideo AI for Shorts, pay particular attention to:
- The first 2–3 seconds
- Vertical formatting
- Short sentences
- Fast visual changes
- Captions
- Clear narration
- One central idea
- A strong ending
Don’t try to explain five different topics in a 30-second Short.
One strong idea is usually better than five poorly explained ones.
How to Use InVideo AI: From Idea to First Draft
At this point, the basic workflow should look like this:
| Stage | What You Do |
| 1. Idea | Decide the topic and goal |
| 2. Brief | Define audience, style, length, and platform |
| 3. Prompt | Tell InVideo AI what you want |
| 4. Model | Select the appropriate AI tools/models |
| 5. Script | Review and improve the generated narration |
| 6. Visuals | Check AI-generated and stock visuals |
| 7. Audio | Review narration, music, and sound |
| 8. Edit | Fix pacing, scenes, text, and transitions |
| 9. Review | Check facts and overall quality |
| 10. Export | Prepare the final video for publication |
This is the core workflow you should understand before moving into more advanced features.
And once you understand this process, How to Use InVideo AI becomes much less intimidating.
🚀 Start Creating With InVideo AI
If you want to test the workflow yourself, this is a good point to open InVideo AI and create a simple first project.
[Try InVideo AI and Create Your First Video →]
Start with a small project rather than attempting to build a 20-minute documentary on your first attempt. A short 30–60 second video is enough to understand how the platform handles your prompt, script, visuals, narration, and editing.
What to Do After InVideo AI Generates Your Video
Your first generation is not the finished product.
This is one of the most important things beginners should understand about How to Use InVideo AI.
After the video is generated, watch it from beginning to end.
Don’t just check whether the scenes look attractive.
Ask:
- Does the opening make me want to continue watching?
- Does the narration match the visuals?
- Are any scenes irrelevant?
- Is the pacing too slow?
- Are there awkward sentences?
- Are captions accurate?
- Is the music too loud?
- Are transitions distracting?
- Does the video actually deliver what the title promises?
If the answer to any of these questions is no, edit the project before publishing it.
The best way to use AI video software is not:
Prompt → Generate → Publish
A better workflow is:
Prompt → Generate → Review → Edit → Improve → Export
That small difference can have a huge impact on the quality of your content.
If you’re building a broader AI video workflow, you may also want to explore our InVideo AI Review, where we examine the platform’s features, pricing, credits, models, workflow, strengths, and limitations in greater detail.
And if you’re comparing InVideo AI with other AI video tools, our guides on HeyGen AI Avatars, How to Use HeyGen, and Kling AI Review can help you understand where each platform fits best.
InVideo AI is particularly interesting when your priority is an all-in-one production workflow, while tools such as HeyGen and Kling AI can be more specialized for particular types of video creation.
🚀 Test the Full InVideo AI Workflow
You’ve now seen the basic process behind How to Use InVideo AI. The best way to understand whether it fits your workflow is to create an actual project.
[Try InVideo AI and Start Your First Project →]
Choose a simple topic, give the AI a detailed brief, generate the first version, and then spend a few minutes improving the result manually.
That hands-on test will tell you much more than simply reading a list of features.
How to Use InVideo AI to Edit Your First Video
Learning How to Use InVideo AI does not end when the platform generates your first draft.
In fact, the editing stage is where you can turn an average AI-generated video into something much more useful and engaging.
The first version is best treated as a starting point. You should expect to change scenes, rewrite parts of the script, replace visuals, adjust the voice, modify music, and improve the pacing before publishing.
This is especially important if you’re using InVideo AI for YouTube, marketing, or faceless content, where viewers expect the video to feel intentional rather than automatically assembled.
Changing or Replacing Scenes
After your video has been generated, review each scene individually.
If a scene does not match the narration, replace it.
If the visual is technically correct but boring, consider using a more dynamic image or AI-generated video.
For example, imagine your narration says:
“AI video tools can help creators produce content faster.”
A generic office stock clip might technically match the sentence, but it may not be particularly interesting.
A better visual could show:
- An AI video interface
- A creator working on a timeline
- A generated video transforming from a text prompt
- Multiple video scenes appearing on screen
The goal is not simply to make the visuals relevant.
The goal is to make them support the story.
That distinction becomes increasingly important as you learn How to Use InVideo AI for professional content.
How to Use InVideo AI to Improve Your Script
One of the easiest ways to improve an AI-generated video is to improve the script.
AI-generated scripts can sometimes contain:
- Repetitive introductions
- Generic statements
- Unnecessary explanations
- Weak transitions
- Excessive filler
- Claims that require verification
Don’t be afraid to rewrite sections yourself.
Suppose the generated script says:
“Artificial intelligence is becoming increasingly popular in today’s modern world.”
There is nothing technically wrong with the sentence, but it doesn’t give the viewer much reason to keep watching.
A stronger opening might be:
“You can now turn a simple idea into a complete video without recording yourself, editing every scene manually, or searching for every visual from scratch.”
The second version creates curiosity and immediately communicates a benefit.
This is one of the most useful lessons in How to Use InVideo AI: AI can accelerate the writing process, but human editing can make the content considerably stronger.
How to Use InVideo AI for Voiceovers
Voiceover quality can have a major effect on how professional a video feels.
Even when the visuals are excellent, an unnatural or poorly paced narration can make the entire video feel automated.
When creating a voiceover, pay attention to:
- Voice style
- Speaking speed
- Pronunciation
- Pauses
- Tone
- Sentence length
- Emotional delivery
For educational videos, a clear and confident voice often works better than an overly dramatic one.
For advertisements, you may want a more energetic delivery.
For storytelling, a slower and more expressive voice can work better.
The right voice depends on the content.
Keep Sentences Easy to Hear
Long sentences may look fine on a screen but can sound unnatural when spoken.
Instead of writing:
“InVideo AI provides creators with a variety of artificial intelligence-powered tools that can be used to simplify multiple stages of the video production process.”
You could say:
“InVideo AI brings several video-production tools into one workspace. That can make the entire process much faster.”
Shorter sentences are usually easier to understand and easier for an AI voice to deliver naturally.
How to Use InVideo AI With AI-Generated Images
Images can be useful when stock footage does not communicate an idea effectively.
This is especially helpful for:
- Technology videos
- Concept explanations
- Historical content
- Product presentations
- Educational videos
- Storytelling
- Social media content
When using AI-generated images, think about visual consistency.
If your video features the same fictional character in several scenes, try to maintain similar:
- Appearance
- Clothing
- Environment
- Lighting
- Camera style
Otherwise, viewers may notice that the character looks completely different from one scene to another.
Consistency is one of the details that separates a quick AI-generated video from a more polished production.
How to Use InVideo AI With Stock Footage
AI-generated content is not always the best choice for every scene.
Sometimes a real stock video is more convincing.
For example, if your video discusses:
- A city
- A famous landmark
- A real product
- A business environment
- A particular profession
- Travel
- Food
- Nature
A high-quality stock clip may communicate the idea more naturally than an AI-generated scene.
This is why learning How to Use InVideo AI should include understanding when not to use generative AI.
A good video may combine several asset types:
AI-generated video + stock footage + images + screenshots + text + narration
The final result can be much more flexible than a workflow where every scene is generated by one AI model.
How to Use InVideo AI for Captions and Text
Captions are especially important for short-form content.
Many people watch social videos without sound, so clear on-screen text can help maintain attention and communicate the main message.
When reviewing captions, check for:
- Spelling mistakes
- Incorrect punctuation
- Timing problems
- Long lines
- Poor positioning
- Words that are difficult to read
Avoid putting too much text on the screen.
If the viewer has to read a large paragraph while simultaneously watching a video and listening to narration, the experience becomes overwhelming.
A better approach is to highlight the most important phrase.
For example:
“Create videos faster with AI”
is more effective on screen than:
“InVideo AI provides a number of different tools that can potentially help content creators produce videos more efficiently.”
Keep visual text short.
How to Use InVideo AI for Background Music
Music can completely change the atmosphere of a video.
A technology tutorial may work well with subtle electronic music.
A travel video may benefit from something more energetic.
A documentary-style video may need something atmospheric and restrained.
The biggest mistake is choosing music that competes with the narration.
If viewers have to concentrate to understand the voiceover because the music is too loud, the music is hurting the video rather than improving it.
Always listen to the complete video before exporting it.
How to Use InVideo AI to Control the Pacing
Pacing is one of the most overlooked aspects of AI-generated videos.
A video can contain excellent visuals and a strong script but still feel boring if every scene remains on screen for too long.
When reviewing your project, look for moments where:
- The same visual stays too long
- The narration moves faster than the visuals
- Several similar scenes appear consecutively
- The introduction takes too long
- The conclusion feels unnecessarily long
For YouTube Shorts and other short-form content, faster visual changes can help maintain attention.
For educational videos, however, changing scenes too quickly can make the content difficult to follow.
There is no universal pacing rule.
The right pace depends on the information you’re presenting.
How to Use InVideo AI for YouTube Videos
YouTube is one of the most obvious use cases for InVideo AI.
You can use the platform to help create:
- Faceless videos
- Tutorials
- Explainer videos
- Product videos
- List videos
- News-style videos
- Educational content
- Commentary videos
- YouTube Shorts
However, the tool should be viewed as a production assistant rather than a complete YouTube strategy.
A successful YouTube video still needs:
A strong topic + compelling title + attractive thumbnail + useful content + good pacing + viewer retention
InVideo AI can help with the production side, but it cannot guarantee that people will click or watch.
That’s why your research should happen before generating the video.
How to Use InVideo AI for Faceless YouTube Channels
For creators who don’t want to appear on camera, InVideo AI can be particularly useful.
A basic faceless workflow could look like this:
- Find a topic with genuine audience interest.
- Research the subject.
- Create the script.
- Generate or select visuals.
- Add narration.
- Add captions.
- Add background music.
- Review the video.
- Improve weak sections.
- Export and publish.
This workflow can dramatically reduce the amount of manual production work involved.
But there is an important warning.
Do not build a faceless channel by publishing dozens of nearly identical AI videos.
The advantage of AI is that it gives you more time to focus on research, storytelling, creativity, and publishing.
Use that advantage.
If you’re specifically interested in building faceless content, our Kling AI Prompts guide can also help when you want more control over original AI-generated visual scenes.
How to Use InVideo AI for YouTube Shorts
Shorts require a slightly different production strategy.
A simple structure is:
Hook
Grab attention immediately.
Value
Deliver one useful idea.
Payoff
Show the result or explain the key takeaway.
CTA
Tell the viewer what to do next.
For example:
“This AI tool can turn a simple idea into a video. Here’s how.”
Then immediately demonstrate the process.
Avoid spending the first ten seconds explaining what the video is about.
The viewer should understand the value almost immediately.
When learning How to Use InVideo AI for Shorts, always remember that short-form content rewards clarity and speed.
How to Use InVideo AI for Marketing Videos
InVideo AI can also be useful for businesses and marketers.
You could create:
- Product demonstrations
- Social advertisements
- Promotional videos
- Service explainers
- Customer education videos
- Website videos
- Internal training content
- Announcement videos
For marketing content, the script should focus on the customer’s problem rather than simply describing the product.
Instead of:
“Our software has many powerful features.”
Try:
“Still spending hours turning one idea into a finished video? This workflow can help you reduce the manual work.”
The second version speaks directly to a pain point.
That principle applies whether you’re creating a YouTube video, advertisement, landing-page video, or social media post.
🚀 Try InVideo AI for Your Own Project
If you’re wondering whether the workflow actually saves time, the easiest way to find out is to test it with a real project.
[Try InVideo AI and Create a Video →]
Start with a short video and compare the time it takes with your normal production process.
How to Use InVideo AI Agents and Workflows
As you explore the platform, you may encounter more advanced options beyond basic video generation.
Depending on the current workspace and available features, InVideo AI can provide workflows and AI agents designed to help with different creative tasks.
These features are useful because they move the platform closer to an AI production workspace rather than a simple prompt-to-video generator.
Instead of thinking:
“I need an AI model to generate a clip.”
You can think:
“I need to complete a video-production task.”
That difference is important.
The model is only one part of the process.
The workflow is what turns the individual capabilities into something practical.
Choosing Between AI Models in InVideo AI
If your InVideo AI workspace gives you access to several models, don’t feel pressured to test all of them immediately.
Start with one project.
Then compare models based on the actual result you need.
For example:
| Your Goal | What to Prioritize |
| Cinematic scenes | Visual quality and motion |
| Product visuals | Detail and consistency |
| Social media clips | Speed and short-form output |
| Explainer videos | Clear visuals and narration |
| Faceless YouTube | Complete workflow efficiency |
| Creative experiments | Model variety |
| Marketing content | Brand consistency and editing |
The “best” model isn’t necessarily the model with the most impressive demo.
It is the model that gives you the result you need with the least unnecessary work.
How to Use InVideo AI Without Wasting Time
One of the biggest benefits of AI video creation is speed.
Ironically, beginners can still waste a lot of time.
They may repeatedly regenerate the same scene because they did not provide enough information in the original prompt.
A better approach is to spend a little more time planning before generating.
Before pressing Generate, decide:
- Video objective
- Target audience
- Platform
- Duration
- Tone
- Visual style
- Narration style
- Important information
- Call to action
This can reduce the number of revisions you need later.
Instead of generating ten random versions, create one well-planned version and improve it.
That is a much more efficient way to learn How to Use InVideo AI.
A Practical InVideo AI Prompt Template
If you’re not sure what to write, use this structure:
Create a about [topic] for [target audience]. The video should be approximately [duration] long and use a [tone] style. Start with [hook]. Cover [main points]. Use [visual style] visuals, [voice style] narration, readable captions, and [music style] background music. End with [CTA].
For example:
Create a 60-second YouTube Short about five AI tools for beginner creators. The audience is people starting faceless YouTube channels. Use an energetic but professional style. Start with a strong hook about saving production time. Introduce five tools with one clear benefit each. Use modern AI-related visuals, confident English narration, readable captions, and subtle background music. End by asking viewers to follow for more AI video tutorials.
This type of structured prompt gives InVideo AI a much clearer creative direction.
How to Use InVideo AI More Like a Professional
Once you’re comfortable with the basic workflow, start thinking beyond individual generations.
Professional-looking production usually comes from consistency.
Try to develop:
- A consistent visual style
- A recognizable intro
- Consistent fonts
- Consistent colors
- A repeatable video structure
- A consistent narration style
- A recognizable CTA
- A repeatable editing workflow
For a YouTube channel, this can make your videos feel like they belong to the same brand.
The objective isn’t to make every video identical.
It is to make the channel recognizable.
Common Beginner Mistakes When Using InVideo AI
Understanding what not to do is just as important as learning How to Use InVideo AI.
1. Using Extremely Short Prompts
A prompt containing only:
“Make a YouTube video about AI.”
doesn’t provide enough creative direction.
Give the AI more context.
2. Publishing the First Generation
Your first generation is a draft.
Review it.
3. Ignoring the Script
A beautiful video with weak information is still a weak video.
4. Using Too Many Visual Effects
More effects do not automatically mean a more professional video.
5. Making Every Scene AI-Generated
Mixing AI-generated content with stock footage, screenshots, images, and other assets can often create a more natural production.
6. Forgetting the Audience
A video for beginners should not sound like a technical conference presentation.
Always ask who you’re creating for.
7. Focusing Only on Speed
AI can help you produce faster, but speed should not become the only objective.
The goal is better content with less unnecessary production work.
🚀 See What InVideo AI Can Do
If you’re ready to move beyond reading about How to Use InVideo AI, test the workflow with your own idea.
[Start Creating With InVideo AI →]
Create one short project, review the generated result, and then edit it manually. That gives you a realistic understanding of both the platform’s strengths and the amount of human input still required.
How to Use InVideo AI: The Workflow to Remember
At this stage, the entire process can be reduced to a simple sequence:
Idea → Brief → Prompt → Model → Script → Visuals → Voice → Edit → Review → Export
Don’t think of InVideo AI as a button that magically creates a perfect video.
Think of it as a production environment that can handle many repetitive tasks while you remain responsible for the creative direction.
That mindset will help you get much more from the platform.
If you are coming from another AI video tool, this is also where InVideo AI can feel different. Instead of focusing exclusively on one type of AI generation, it attempts to connect multiple stages of the production process.
For creators who value convenience and speed, that can be a major advantage.
What Should You Do Next?
If you’ve followed this guide so far, you already understand the foundation of How to Use InVideo AI.
The next step is not to read another ten tutorials.
Create something.
Pick a topic you already understand.
Write a clear brief.
Generate a short video.
Then watch the result critically.
Replace the weak scenes.
Improve the script.
Adjust the narration.
Fix the captions.
Balance the music.
And watch it again.
That process will teach you far more than simply exploring menus.
In the next stage of this guide, we’ll go deeper into how to use InVideo AI for specific content types, including YouTube automation, faceless channels, Shorts, marketing videos, and more advanced workflows. We’ll also look at how to make the process more efficient while avoiding unnecessary AI generation and wasted credits.
If you’re still comparing AI video platforms, you can also continue with our InVideo AI Review, which looks at the platform from a broader perspective, including its features, models, pricing, credits, strengths, and limitations.
How to Use InVideo AI for YouTube Videos
If you’re learning How to Use InVideo AI for YouTube, the platform can be especially useful when you want to produce complete videos without handling every part of the production process manually.
A typical YouTube workflow involves research, scripting, narration, visuals, editing, subtitles, music, transitions, and exporting. How to Use InVideo AI effectively means learning how to connect these steps rather than simply entering a prompt and accepting the first video the platform generates.
For example, you can start with a simple idea such as:
“Create a 6-minute YouTube video explaining the best AI video tools for beginners.”
Instead of treating the generated result as the finished product, use it as a starting point. Review the script, adjust the visual direction, replace weak footage, improve the narration, and make sure the final video actually matches your channel’s style.
This is one of the most important lessons when learning How to Use InVideo AI:
AI can accelerate the production process, but your direction determines the quality of the final video.
If you’re building a faceless YouTube channel, you can also combine InVideo AI with other tools depending on the type of content you create. For example, our Kling AI Review explores a tool better suited to generating individual AI video scenes, while our HeyGen AI Avatars guide focuses on AI presenters and avatar-based videos.
How to Use InVideo AI for Faceless YouTube Channels
One of the most practical applications of How to Use InVideo AI is faceless YouTube content.
You don’t necessarily need to record yourself on camera. Instead, you can build videos around:
- AI-generated scripts
- Stock footage
- AI-generated visuals
- Voiceovers
- Background music
- Text overlays
- Captions
- B-roll
- Animated scenes
A simple workflow could look like this:
Topic → Script → Voice → Visuals → Editing → Captions → Final Review → Export
The advantage is that you can manage most of these steps from one environment.
However, don’t make the mistake of producing completely generic videos. If every scene looks like a stock-footage slideshow, your content may feel interchangeable with thousands of other channels.
To make your videos more distinctive, give InVideo AI specific instructions about:
- Audience
- Tone
- Video length
- Visual style
- Narration style
- Scene pacing
- Music
- On-screen text
- Call-to-action
- Brand identity
For example, instead of writing:
“Make a video about AI tools.”
Try something more specific:
“Create a 7-minute YouTube video for beginners explaining three AI video tools. Use a professional but conversational tone, short paragraphs, fast-paced visual changes, clear section headings, and practical examples. Avoid exaggerated claims and keep the narration easy to understand.”
The second prompt gives the AI much more direction.
How to Use InVideo AI for Social Media Content
How to Use InVideo AI isn’t limited to long-form YouTube videos.
You can also use the platform as part of a broader content strategy for short-form platforms.
For example, one long-form topic can become several pieces of content:
One YouTube video → multiple Shorts → Instagram Reels → TikTok videos → promotional clips
This can dramatically improve the efficiency of your content workflow.
Imagine you publish an article about AI video generators.
You could create:
- A long YouTube explainer.
- A 30-second TikTok explaining the biggest mistake beginners make.
- An Instagram Reel showing three recommended tools.
- A YouTube Short comparing two platforms.
- A short promotional video directing viewers to your website.
This is where understanding How to Use InVideo AI becomes more valuable than simply knowing where the Generate button is.
The real goal is to create a repeatable content-production system.
Example Social Media Prompt
You could give InVideo AI a prompt such as:
“Create a 30-second vertical video explaining why beginners should use AI video tools. Start with a strong hook in the first three seconds, use fast visual changes, add readable captions, keep the narration conversational, and finish with a clear call-to-action.”
Then review the result and adjust the scenes that don’t communicate the idea clearly.
How to Use InVideo AI to Repurpose Existing Content
Another useful application of How to Use InVideo AI is content repurposing.
If you already have:
- A blog article
- A YouTube script
- A podcast transcript
- A presentation
- A product description
- An educational guide
you don’t necessarily have to start from scratch.
You can transform existing information into video content.
For example, suppose you have a 2,500-word article about AI video tools.
Instead of manually creating a new script, you can use the article as the foundation for a video and then edit the generated result.
The process becomes:
Existing content → Video script → Visual scenes → Voiceover → Editing → Export
This approach is particularly useful for website owners and affiliate marketers because one piece of content can support multiple traffic channels.
Your article can attract Google traffic.
Your video can attract YouTube traffic.
Your short-form clips can attract social media traffic.
And all of them can point users back to your website.
How to Use InVideo AI Without Wasting Credits
If your plan uses credits or other usage limits, learning How to Use InVideo AI efficiently becomes important.
One of the easiest mistakes is generating multiple complete videos simply because the first version isn’t perfect.
Instead, think in stages.
Step 1: Plan the Video First
Before generating anything, decide:
- What is the video’s purpose?
- Who will watch it?
- What should viewers learn?
- How long should it be?
- What action should viewers take?
Step 2: Create a Strong Prompt
A weak prompt usually produces a generic result.
Give the system enough context to understand your expectations.
Step 3: Review Before Regenerating
Don’t immediately regenerate the entire project because one scene is weak.
Identify exactly what needs improvement.
Maybe the problem is:
- The visual
- The narration
- The scene duration
- The wording
- The transition
- The music
Fix the specific problem whenever possible.
Step 4: Avoid Unnecessary Generations
If the video is already 80% correct, editing the remaining 20% may be more efficient than starting again.
This is one of the most practical principles when learning How to Use InVideo AI:
Use AI for speed, then use editing for precision.
Common Mistakes When Learning How to Use InVideo AI
Even though InVideo AI can simplify video production, beginners can still get poor results if they use the platform incorrectly.
1. Using Extremely Short Prompts
A vague prompt gives the AI too much freedom.
Instead of:
“Make a video about marketing.”
Give it information about the audience, format, tone, structure, and goal.
2. Accepting the First Version
The first generation should not automatically be considered the final video.
Watch it from beginning to end.
Look for:
- Repetitive footage
- Incorrect visuals
- Awkward narration
- Weak hooks
- Unnecessary scenes
- Poor pacing
- Repetitive wording
3. Ignoring the First Few Seconds
For social media and YouTube, the opening matters enormously.
Don’t spend the first 15 seconds explaining what the video is going to explain.
Give viewers a reason to continue.
For example:
“Most beginners use AI video generators completely wrong. Here’s what you should do instead.”
That is more compelling than:
“In this video, we’re going to talk about AI video generators.”
4. Making Every Video Look the Same
AI-generated content can become repetitive.
Change your:
- Visual style
- Scene composition
- Pacing
- Music
- Narration
- Hooks
- Storytelling structure
5. Forgetting Human Editing
The goal isn’t to remove humans from the production process.
The goal is to remove unnecessary manual work.
Your final review is still important.
How to Use InVideo AI More Professionally
Once you understand the basic workflow, you can start treating InVideo AI as a production assistant rather than simply an automatic video generator.
Create reusable structures for your content.
For example, a YouTube channel could have a standard format:
Opening
Hook → Problem → Promise
Main Content
Point 1 → Example → Point 2 → Example → Point 3 → Example
Ending
Summary → Recommendation → CTA
You can then adapt this structure to different topics.
This creates consistency across your channel while allowing InVideo AI to handle much of the repetitive production work.
For a faceless channel, you could also develop a consistent visual identity:
- Same font family
- Similar colors
- Consistent caption style
- Similar narration style
- Consistent intro
- Consistent outro
- Similar pacing
This makes AI-assisted content feel more like a real brand.
Is InVideo AI Good for Beginners?
If you’re wondering How to Use InVideo AI because you’re completely new to video creation, the platform can be a useful starting point.
You don’t need to understand every professional video-editing technique before creating your first project.
The important thing is to learn progressively.
Start with:
- Creating a simple video.
- Understanding the generated script.
- Editing scenes.
- Replacing visuals.
- Adjusting narration.
- Adding captions and music.
- Exporting the final video.
- Reviewing what could be improved.
After several projects, you’ll begin to understand which prompts work best and which parts of the workflow require your attention.
Ready to create your first AI video?
Try InVideo AI and start creating your first project →
How to Use InVideo AI for Affiliate Marketing
InVideo AI can also be useful if you’re creating content around products, software, or affiliate offers.
For example, you could create videos explaining:
- AI software
- SaaS products
- Online tools
- Productivity platforms
- Marketing software
- Creator tools
A simple affiliate video structure could be:
Problem → Solution → Product Introduction → Demonstration → Pros & Cons → Recommendation → CTA
The important part is maintaining credibility.
Don’t make unrealistic claims simply to generate more clicks.
Instead, explain what the product does, who it is for, what its limitations are, and why someone might choose it.
That approach can produce better long-term results than aggressive promotional content.
How to Use InVideo AI for Business Videos
Businesses can use How to Use InVideo AI principles for more than social media.
Potential applications include:
| Use Case | Example |
| Product videos | Explain a new product |
| Marketing | Create promotional campaigns |
| Training | Internal educational videos |
| Presentations | Convert information into visual content |
| Social media | Create short promotional clips |
| Tutorials | Explain products or services |
| Ads | Produce video ad concepts |
| YouTube | Build educational or branded channels |
For a small business, the biggest advantage may not be cinematic quality.
It may simply be the ability to produce useful content faster.
How to Use InVideo AI: A Simple Workflow to Remember
If everything in this guide feels like too much information, remember this simplified process.
1. Start With the Goal
Know what you want the video to achieve.
2. Describe the Audience
Tell InVideo AI who the video is for.
3. Explain the Format
Specify YouTube, Shorts, social media, advertisement, tutorial, or another format.
4. Give the AI Direction
Explain the tone, structure, visuals, and pacing.
5. Generate the First Draft
Use the first generation as a foundation.
6. Edit
Replace weak scenes and improve the script and narration.
7. Review
Watch the entire video before publishing.
8. Repurpose
Turn the finished content into additional formats whenever possible.
This is the core of How to Use InVideo AI effectively.
Frequently Asked Questions About How to Use InVideo AI
How to Use InVideo AI for the first time?
Start by creating a project and describing exactly what you want to produce. Give the AI information about your topic, audience, format, tone, and desired outcome. Generate the first version, then review and edit it instead of treating the first generation as final.
Can I use InVideo AI for YouTube?
Yes. You can use the platform to help create scripts, visuals, narration, scenes, captions, and other elements of a YouTube video. The final result should still be reviewed and edited before publishing.
Can I use InVideo AI for faceless videos?
Yes. Faceless content is one of the practical applications of the platform because you can build videos without appearing on camera.
Is InVideo AI good for beginners?
It can be a useful option for beginners because much of the video-production process can be handled within one workflow. However, beginners should still learn basic storytelling, editing, and content strategy.
How can I get better results from InVideo AI?
Use detailed prompts, provide clear instructions, review the generated video carefully, replace unsuitable visuals, and make manual improvements before publishing.
Can InVideo AI create short-form videos?
Yes. You can use the platform to create content designed for short-form social platforms. Always select an appropriate aspect ratio and structure the video around a strong opening hook.
Can InVideo AI replace a professional video editor?
Not completely. It can automate and accelerate many production tasks, but professional editors still provide creative judgment, storytelling, visual consistency, and detailed control.
Is InVideo AI worth learning?
If you regularly create videos and want to reduce the amount of manual work involved in scripting, visual selection, narration, and editing, learning How to Use InVideo AI can be worthwhile.
Final Thoughts: How to Use InVideo AI Effectively
Learning How to Use InVideo AI is not really about finding a magic prompt that creates a perfect video with one click.
The more useful approach is to think of InVideo AI as part of your production workflow.
Use it to accelerate the repetitive parts of video creation, then take control where human judgment matters most.
Plan the idea.
Give the AI clear instructions.
Generate a strong first draft.
Review every important scene.
Improve the narration.
Replace weak visuals.
Add your own branding.
Then publish only when the video is genuinely useful to the viewer.
For creators building YouTube channels, marketers producing regular campaigns, businesses creating educational content, and beginners who don’t want to spend hours learning complicated editing software, this workflow can save significant time.
The biggest lesson from How to Use InVideo AI is simple:
Don’t ask AI to replace your creative direction. Ask it to make your creative direction faster to execute.
If you’re ready to test the workflow yourself, the best way to understand what the platform can actually do is to create a real project rather than simply watching tutorials.
Try InVideo AI and create your first video →
And if you’re comparing different AI video tools, don’t stop at one platform. Our Kling AI Review covers a different approach focused more heavily on AI-generated video scenes, while our HeyGen AI Avatars guide explores presenter-based video creation.
The right tool ultimately depends on what you’re trying to create.
But if your priority is a faster, more centralized video-production workflow, How to Use InVideo AI is worth understanding and experimenting with.